Tag Archives: cleaning

Super Cheap Pen/Pencil Holders

Super Cheap Pen/Pencil Holders

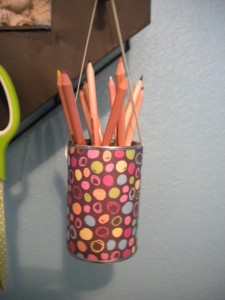
I needed something to keep my pens and pencils in but didn’t want to spend much money…or any money if I could get by with it. I came up with this super simple (and inexpensive) idea.

Things you need:
Cans (mine had enchilada sauce in them…Yum!)
Craft paper
Glue
Ribbon

*The first thing I did was to use a drill to make two holes in the can (one on one side of the can, and one on the other side directly across from each other). Even though I used a drill, you could a screw (or something else that is sturdy and sharp) and hammer it through the can.

*I then cut the paper to fit around the can and glued it on. If you’re impatient and don’t want to hold onto the can while the paper dries you could wrap a rubber band around it (just don’t wrap it too tightly or it could crinkle the paper).

*Use a nail (or ink pen) and poke a hole through the paper where the holes in the can are.

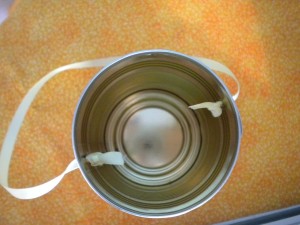
*Thread a piece of ribbon in one of the holes and tie a knot on the inside so the ribbon won’t come out of the hole.

*Thread the other end of the ribbon into the other hole on the opposite side (starting from the outside of the can). Before you tie it in a knot, decide how long you want the ribbon to be. I marked a spot on the ribbon where my knot should go. Once you’ve decided on your length, tie the ribbon on the inside of the can. I put a little bit of glue on each of the knots to help it hold a little better.

Now I have super cute pen/pencil holders and I made them from things I had in my home! I love them so much I think I might make some more!
Turning A Wasted Space Into a Work Space

Turning A Wasted Space Into a Work Space

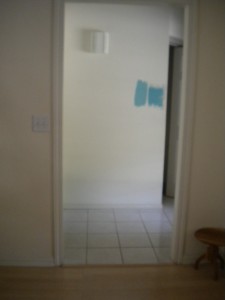
I have a small area between the living room and the master bed room that is just wasted space. It’s only about a 4×4 foot space. It’s a bright area; light comes from the living room, plus there is an outside door in that tiny space as well. Since I moved here, that space has stumped me. I hate wasted space!

One day I was thinking about how nice it would be to have a space I could sit and drink my tea and look out at the birds in the back yard. It would also be nice to have a little area to read, write letters, be inspired (I know, I want a lot of things). Could I make all that in that little 4×4 foot space? Could I make a mini-sunroom, work space, creative nook, and reading area? I could try!

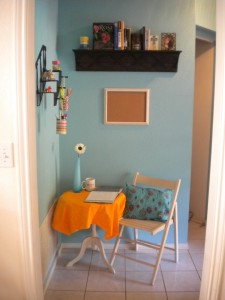
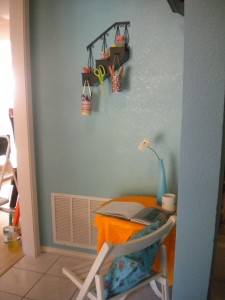
I worked on it all day today, and I have to say that I’m really happy with my new space. Not only did I get all the things I wanted out of this space, I also made homes for things that didn’t have a home before:

*I added space for several books on the new shelf. On a side note, that shelf came from Hobby Lobby and I got it half off so it only cost me $22.
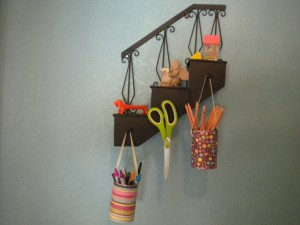
*I added a space for colored pencils, pens and other office supplies. The step shelf also came from Hobby Lobby and was also half off so I paid $10 for it.
*I used a chair that has been in my garage for 2 years.
*I used a table that came from outside. The paint was worn so I made an easy table cloth.
*I used an old picture frame to make a cute cork board.

If you’d like to see how I made the cute little pen/pencil holders go to my “Make It” section! You’ll also see how I made the cork board.

In case you’re wondering “Hey! What’s that white thing hanging on the wall in the “before” picture and where did it go in the “after” picture?” That is my door bell. I hung the shelf directly under it and put a book in front of it to hide it. Pretty clever!

You may also be wondering who that person is in the back ground of the “before” picture. That is my daughter – I have no idea how she sneaks into some of these pictures!

How To Make Your Own Dusting Spray

How To Make Your Own Dusting Spray

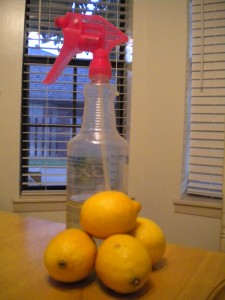
It was that dreaded time of the month again – time to dust the living room. I really don’t like to dust, and I usually make my kids do it. I should probably dust more often than I do…but I don’t. This time I grabbed my orange scented Pledge dusting spray and thought to myself “Hmmm, can I make something that is as good as this…without the chemicals?

I found three dusting spray recipes online and tried all three. Unfortunately, I didn’t really like any of them. After messing around with the recipe I came up with one I liked. Feel free to change it any way you like. One recipe I found had 1/2 cup of olive oil in it (wow, that’s a lot!) and the other two only had 2 tablespoons (that just didn’t seem like enough). You may like your spray a little more or a little less oily than mine. I would start out with the 2 tablespoons and add more as you see fit.

Here’s my homemade dusting spray recipe:
4 teaspoons light olive oil
1/4 cup lemon juice
1/4 cup white vinegar
2 cups water
Spray bottle (16 oz size or larger)
*Instead of using the lemon juice and the white vinegar, you could use 1/2 cup of the homemade kitchen cleaner that I made in an earlier post. I tried it both ways and like the one with my homemade cleaner in it better because the vinegar smell wasn’t as strong.

Simply put all the ingredients in your spray bottle and shake to mix it up. Because it has water and oil in it, you’ll have to give it a little shake each time you use it. This gave my furniture a nice shine and it made me feel good knowing I wasn’t spraying things down with a bunch of chemicals. Plus this recipe is super cheap!

This mixture is much lighter in color than the homemade kitchen cleaner but, just so you or your family don’t get confused, it’s probably a good idea to label your spray bottle. You might even want to include the recipe you used so you’ll remember how to make it next time.

How To Make Your Own Cork Board

How To Make Your Own Cork Board

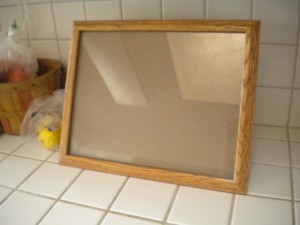
Yesterday I decided that I needed a cork board. I’d actually like to have a few of them. I don’t need anything very big – just something small (and cute). I don’t like to rush right out and buy something new if I don’t need to. I like to think about how I can make things using what I have lying around. A little light bulb went off in my head (or maybe above it, just like in the cartoons). I remembered that I had a very plain picture frame in my closet. I decided to paint it, and get rid of that ugly brown.

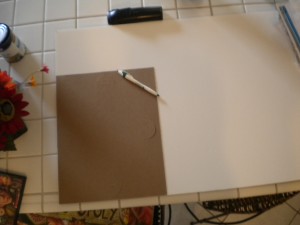
Now for the cork part. I went to Hobby Lobby and bought a 20×28 cork project sheet. It was $6.99 but I had my 40% off coupon! If you’re looking for these handy sheets, they are in the same aisle as the poster board and foam board. I came home and traced the cardboard piece that came with the frame onto the back of the cork sheet. I used a craft knife to cut it out – so easy!

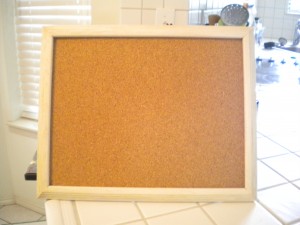
I then slid my cork sheet into the frame and viola! I had a cute cork board that will fit perfectly in the small space I have for it. Better yet, I have a lot of the cork sheet left over so I can do this project again and again! I have some very small frames that I don’t have any use for and I think I’ll turn them into adorable baby cork boards! I know, it doesn’t take much to get me excited.

Hopefully in a week or so I’ll show you where I’m going to hang my new cork board. But, that is still a work in progress 🙂

What Should and Shouldn’t Go In Your Dishwasher

What Should and Shouldn’t Go In Your Dishwasher

The other day I was looking at design books at the book store. I came across one called The Shabby Chic Home by Rachel Ashwell. It is one of the most beautiful books I’ve ever seen. The pictures were absolutely amazing.

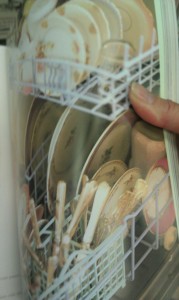
I opened it up to a beautiful picture of an open dishwasher that was full of gorgeous dishes (please excuse the picture of my thumb in the picture). I thought to myself how delightful it would be to open my dishwasher and see something like that! There was a caption on the page that said “Even opening the dishwasher should be a joyful experience”. If I had dishes like that it probably would be! But it got me thinking, should dishes like that (antique, or with gold edges) really be washed in the dishwasher? I decided to look it up.

It turns out, you shouldn’t put antique dishes in the dishwasher, or any dish that is hand painted. If it has a gold edge it may be OK to put it in there but check and see if it has a label under the dish that says if it’s OK or not. Some gold rimmed dishes (if they’re marked) will withstand the heat and pressure in a dishwasher. I would be afraid to try it. I have some beautiful Christmas dishes that are edged in 24K gold and I wouldn’t even think of putting them in there.

While searching for my answers, I came across a very helpful article from Real Simple. I’ve attached the link here so you can check it out. It gives a very detailed list of what should and shouldn’t go in a dishwasher. Rather than me quoting bits and piece from it I think you should just check it out. I was surprised to see that you could put hair brushes (as long as they’re not wooden), potatoes and shin guards in there! You have to check out their complete list! It will blow your mind!

http://www.realsimple.com/home-organizing/cleaning/kitchen/you-can-put-that-in-the-dishwasher-00000000022437/print-index.html

To get Rachel’s Book click here:

Super Inexpensive Drawer Organizer

Super Inexpensive Drawer Organizer

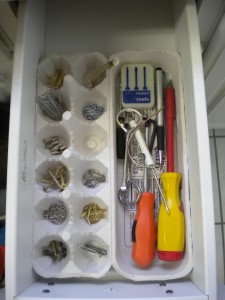
I have a little drawer in my laundry room where I keep a few tools and miscellaneous pieces of hardware (nails, bolts, picture hangers, etc). Every time I need something I have to rummage through there to find it. Not anymore! Today, while trying to find some tiny nails that I KNEW were in there somewhere, I had an idea. Why not use an egg carton?

I put the egg carton in my drawer (it fit perfectly!) and filled it up! Now I can see exactly what I have! This would also be a great idea for a drawer in a home office (you could fill it with tacks, rubber bands, paper clips, etc) or for your bathroom (this could be a great way to keep track of your jewelry).

I love it when simple, inexpensive things make a big difference!

Make Your Own Powder Carpet Deodorizer

Make Your Own Powder Carpet Deodorizer

I love a house that smells good! I used to use a lot of room sprays and carpet deodorizers until they started to bother my daughter. Something in them was causing her eyes to itch and made it hard to breathe (who knows what kinds of chemicals are in those things). I decided to start making my own.

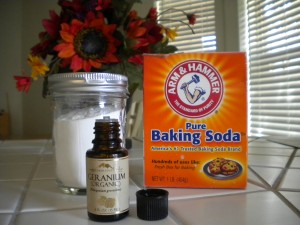
It turns out that making your own carpet deodorizer is VERY simple. All you need is an empty jar with a lid, baking soda, and your favorite essential oil. You can buy essential oils from your favorite health food store or from Mountain Rose Herbs (there is a link for them at the bottom of this article). For more information on essential oils, check my last article about adding essential oils to an all-purpose, make at home, kitchen spray.

Put one cup of baking soda into a jar, add 20 drops of your favorite scent (I added 1/4 cup baking soda and 5 drops of oil and then kept repeating in this pattern to make sure the oil was all throughout the jar), shake it up and let it sit for 12 hours with the lid on. There ya go! It’s done! Sprinkle a little on your carpet or furniture and let it sit for a minute or two and then vacuum it up. Today my house smells like Geranium Rose. I think when I run out, I’ll make a lavender one next!

Mountain Rose Herbs

Using Facebook To Sell Things

Using Facebook To Sell Things

In my book, Border Hoarders, I talk about the many places you can take your unwanted things. Facebook never entered my mind until I was on there today and I saw a friend list several things she wanted to get rid of. My home page was flooded with pictures of items she no longer wanted, along with a description and price she wanted for each one. I kept an eye on them through out the day and I was surprised to see how many people actually wanted these things! There were several items that even had more than one person wanting it!

If you have a lot of friends on Facebook, this can be a great way to sell things you don’t want – and it’s free! After seeing how she did things, I’ve come up with a few tips for you in case you want to try this yourself:

*Take a good picture of each item.
*Make a new post for each item.
*Give each one a good description.
*Either list the price you want or let people know you’ll take the best offer.
*Wait until you have several items that you can put up all at once. If you do a little at a time, day after day, people might get annoyed and unfriend you.
*You can make an album on Facebook called “items for sale” and you can add to this every once in while. When you do, put a post on your page that says “I just added more to my ‘for sale’ album. Come check it out”. Just make sure to delete pictures of items that you’ve already sold.

I might try this out next time I have some things I want to get rid of!

Adding Essential Oils To Your Homemade Cleaning Products

Adding Essential Oils To Your Homemade Cleaning Products

In an earlier post, I showed you how I made a wonderful all-purpose cleaning spray. I have since made several batches of it and absolutely love it! One thing I’ve done to cut back on the vinegar smell (which really isn’t all that bad to begin with) is to use essential oils. I love essential oils. You can buy them from a place called Mountain Rose Herbs. They have many kinds of essential oils and most of them are organic and are very reasonably priced.

Mountain Rose Herbs

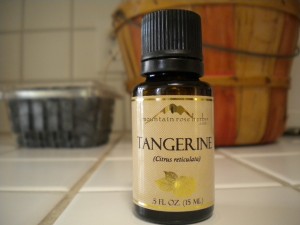
My favorite essential oil to add to my all-purpose spray is Tangerine oil. A .5 ounce bottle costs less than $3. I add about 20 drops to each batch of spray (you can add more if you like) and my bottle still looks full. It’s going to last me a long time! If you look on their website, you’ll find many essential oils to chose from.

If you’re going to buy essential oils from a health food store, make sure they are therapeutic grade and come in a blue or amber bottle (this helps to preserve their potency). Keep in mind that these oils are pretty potent – a little goes a long way! While most essential oils are great for your skin, a few may actually irritate it. It should say right on the bottle if this is a possibility. The tangerine oil I use in my all-purpose cleaner has a little warning on the back that says “potential skin irritant”. Since I use it in a cleaner I’m not concerned about it, however, I wouldn’t put it in my bath. I have gotten a few drops on my hands and it didn’t do anything.

There are many ways you can use essential oils to make your home (and homemade cleaners) smell great! Here are a few ideas:

*Put a few drops (I use 15) on a Kleenex and put it in your bag-less vacuum cleaner. When you run the vacuum it makes your room smell great!

*Put a few drops in a bottle with water and spray around your room as a room deodorizer (or spray your furniture).

*When you make a paste using baking soda and water for cleaning sinks or grout on your counter tops, add a few drops of essential oils.

The great thing about using essential oils to freshen up your home, is that the scent from these oils comes directly from a plant, fruit, or flower. You’re not spraying your home with chemicals which can cause many different kinds of illnesses. Plus it’s cheaper!