Tag Archives: organizing

Travel Check List

Travel Check List

Two weeks ago today I got the kind of phone call no one wants – a close family member had died in a car accident. In my shocked and saddened state I had to pack for my family and I and get ourselves ready for what would be a 3000 mile round trip in the car. We were in the car, loaded and ready to go, in less than 24 hours.

On the trip I thought of the many things I would’ve packed if I would’ve had more time…or if I would’ve been thinking clearly. I decided that I needed to make myself a travel check list.

We travel a lot and I’m always making little lists of things I need to bring. Why not make a large, printable list that contains my most often packed items? That way, whether I’m in a hurry or not, I can make sure to pack the things I need.

Here is my travel check list. I have left open spaces for notes and other items to be listed. Feel free to print out as many as you need. You can also share this with anyone you think might need it. Just please make sure to give me credit for it and include my website.

Safe travels my friends. Enjoy life…it’s way too short.

Travel Check List

Make Your Own Chalk Board

Make Your Own Chalk Board

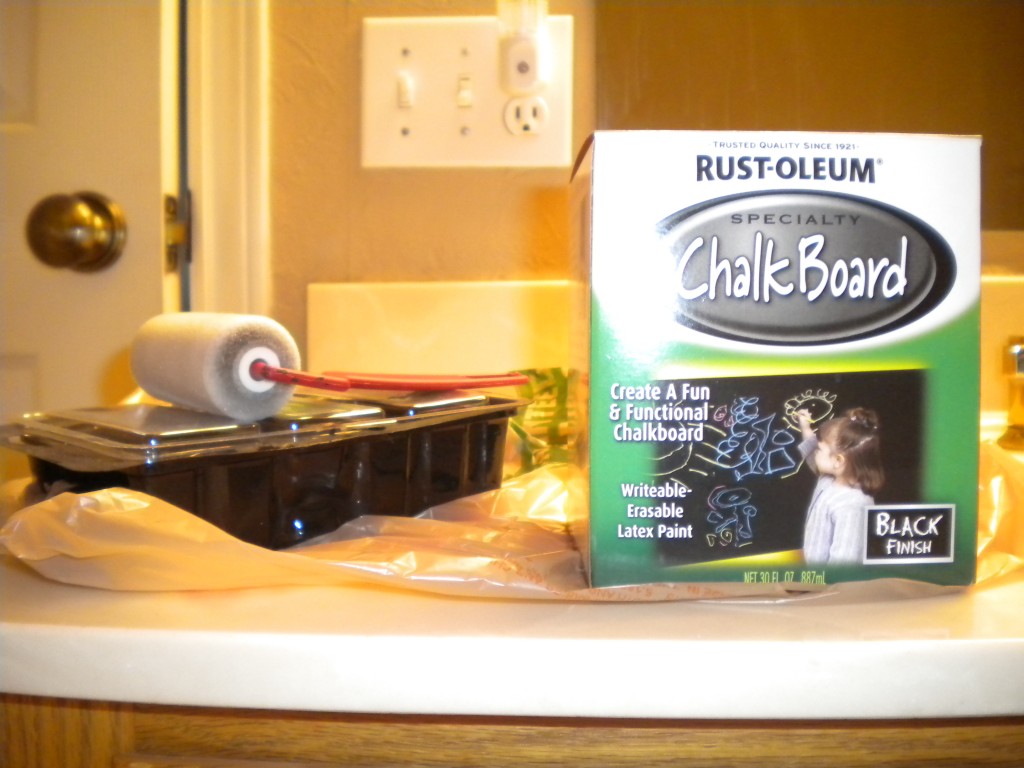
Rust-oleum Chalkboard Paint

I love chalkboard paint! You can turn just about anything into a chalkboard:
*The inside of one of your kitchen cabinets – keep your to-do’s written on it
*The side of a cabinet in your kitchen – jot down grocery items you need
*The side of shelves in a closet – write down random thoughts (I did this in my husband’s closet)
*Cover a thin piece of wood with chalkboard paint and hang it in your office
*Turn an entire wall into a giant chalkboard – fun for the whole family!

I usually get my chalkboard paint at Home Depot but you can get it at any place that sells paints. I’ve tried it as a spray paint (it costs around $6) and as a paint in a can ($10). I liked them both. Which one you’ll use depends on the project you’re doing. If you’re spraying something that you can take outside (like a cabinet door, a shelf, or a board) you could use the spray paint. If you’re painting something that can’t be taken outside, I would use the can of paint.

Back in the day, if you wanted to make yourself a chalkboard, you were restricted to black. Not anymore! You can now buy it in any color you want. Rust-oleum makes a chalk board paint that you can take up to the counter in your paint section and have them mix in any color you want.

If you want to mix your own, you could try this recipe:
*Mix 1/2 cup of latex paint (or acrylic) in your desired color with 1 tablespoon of unsanded tile grout and stir together.
*Use a paint brush to paint it onto your surface. When it’s dry sand lightly with 150 grit sandpaper.
*Apply several coats for best results (sanding in between each coat).
*This may dry rather quickly so I would make it in small batches and work quickly.

Why would you make your own chalkboard paint if you can have the color you want custom made for you at a paint store? Covering something with chalkboard paint takes very little paint. If you buy it in a can, you’ll have 30 ounces of chalkboard paint sitting around. That’s a lot of extra paint! When you mix it up yourself with the recipe above, you are just making what you need.

Whether you go with chalkboard paint in a spray can, in a paint can, or make your own, be sure to lightly chalk the entire surface area of your project when the paint is dry (Rust-oleum recommends waiting three days for the paint to cure). This will insure that the messages and notes you write on it, can be erased easily.

If you have used chalkboard paint, I’d love to hear about it! Either post it on this message, send me a message using the “Contact” tab, or tell me about it on Facebook!

Ook Hooks

Ook Hooks

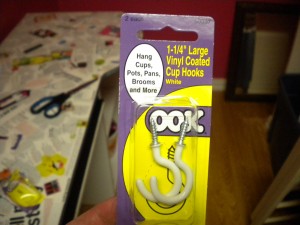
I recently discovered Ook Hooks at Home Depot. They are great for hanging up light weight items like empty purses, hats, jewelry, scarves, etc. I tried to use 3M Command Hooks but my walls are textured and the hooks wouldn’t stick (bummer, I really like those hooks). Ook Hooks come in packages of 2 and are around $2 a pack. They easily screw into your wall (no tools needed) and are immediately ready to use (unlike command hooks which make you wait at least an hour).

To see exactly how I used Ook Hooks, check out my pages on organizing “His” and “Hers” closets.

Ook Hooks

Organizing His and Hers Master Bedroom Closets – Part Two “His”

Organizing His and Hers Master Bedroom Closets – Part Two “His”

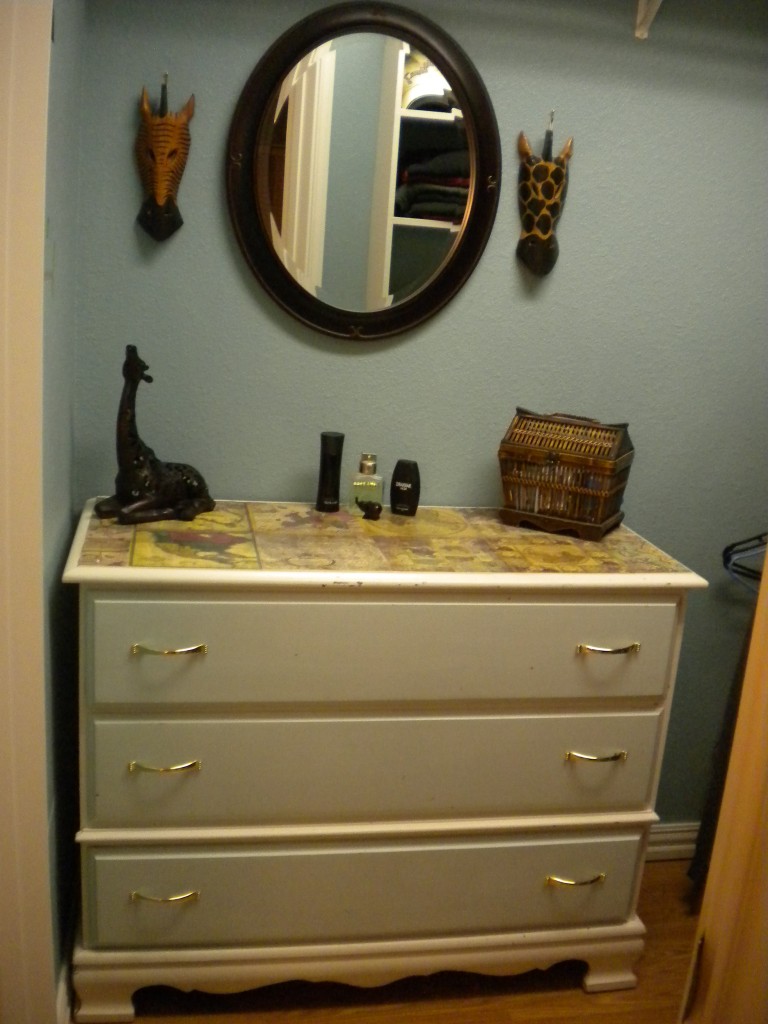
The Finished Dresser

I decided a little over a week ago to clean and organize our master bedroom closets. In our current house, my husband and I have our very own closets (first time ever!), and they were in need of some sprucing up. My closet was a mess. To see the transformation check out the part one of this article here at Organizing His and Hers Master Bedroom Closets – Part One “Hers”.

My husband’s closest was much more organized than mine was (less stuff) but it was very boring and still needed a little organizing love to make it better. Unfortunately, I forgot to take a “before” picture. Just picture it all white with things piled up on the dresser and you’ll have an accurate mental picture.

The first thing I did was remove EVERYTHING from the closet. I painted the walls a beautiful color called Gulf Winds. It’s from Behr. I then cleaned the floors, shelves, and all of the molding. Now it was time to get organized.

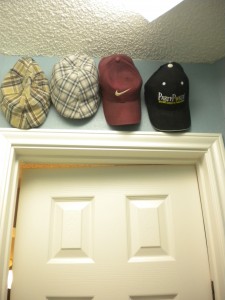
*My husband loves hats almost as much as I love purses. I hung Ook Hooks above the door to hold his four favorite hats. The others I stacked on a shelf.
Hats Haning on Ook Hooks

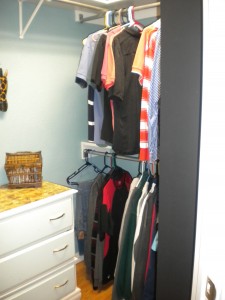
*I organized his clothes by putting all of his business clothes (which he wears to work 5 days a week) on the top bar, and all of this regular, every day clothes on the bottom. This makes it easy to see exactly what he has (or needs) to wear to work each week.

*The dresser was pretty beat up. I used Mod Podge and put beautiful old looking maps on the top of the dresser to cover it up. To see exactly what I did, go to my post on how to decoupage a desk or dresser

*I painted the side of his shelves with chalkboard paint. Now he’ll be able to write himself notes and erase them when he doesn’t need them anymore (no more little strips of paper that end up getting lost).

Black Chalkboard Paint On Side of Shelves

And, just for fun, I painted a toucan on the left wall. Now his closet is clean, organized, and interesting!

Toucan

Organizing His and Hers Master Bedroom Closets- Part One “Hers”

Organizing His and Hers Master Bedroom Closets- Part One “Hers”

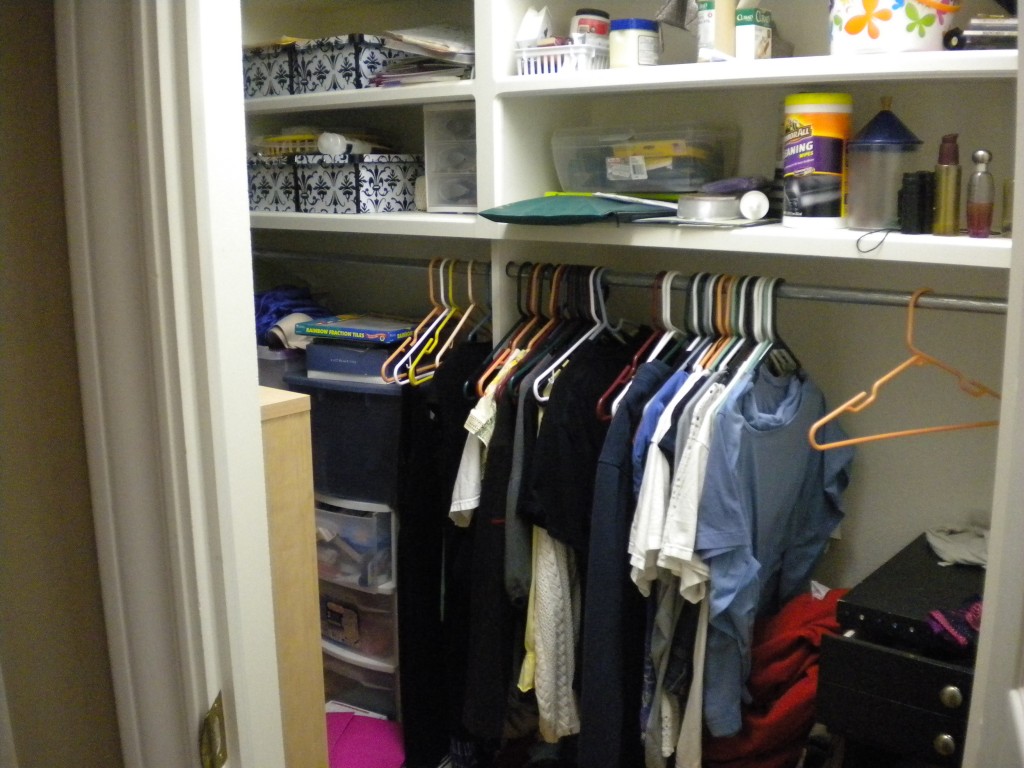
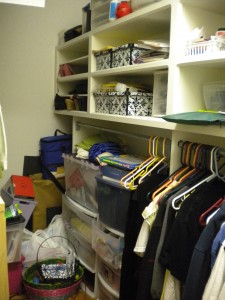
My Closet Before

I have a large closet (11 feet by 5 feet). The best part is, it’s all mine! I don’t have to share it with anybody! This is the first house we’ve lived in that has “his” and “hers” master bedroom closets. My husband’s closet is about half the size of mine (still a good size).

My Closet Before

When we first moved in, more than just my clothes went in my closet. Extra clothing, craft supplies, books, picture frames…just about everything that didn’t have a permanent home had a temporary one in my closet. It got to the point where I had to squeeze in to my closet to get my clothes every morning. Finally I decided to make some changes.

I used my Room Worksheet (if you don’t have a copy yet, sign up for my newsletter and you’ll get my free downloads) to determine exactly what I wanted out of my space. I decided I wanted to turn it into a dressing room!

First, I had to take every single thing out of my closet. I sorted through every item, every box, every folder…everything! I threw away trash and filled a bag for Good Will. Out of season clothes when into Space Bags (I love those things). Craft things were taken to a closet near the kitchen where I actually do my crafts. Extra blankets (also put into Space Bags) were taken to a hall closet. This sorting process took me two days.

After the sorting was finished, it was time to paint. I painted the closet a pink color called Tropical Smoothie in satin from Behr (I got it at Home Depot. If you use this color it’s best to get it with the primer in the paint. It covers better this way).

Once the paint was dry, it was time to bring things back into the closet. I wanted this to be an area where I could do my hair and put on my make up, as well as get dressed in the morning. When we first moved into this house there was a junky looking white desk in the garage. Upon further inspection, I realized it was sturdy, just stained. I scrubbed it down and put it in my closet. I couldn’t get the stains off of the top of the desk so I did some decoupage and viola! I have a one of a kind desk that I love. For information on how I did it, check out the “Make It” section of the website here http://www.borderhoarder.com/how-to-decoupage-a-desk-or-dresser/

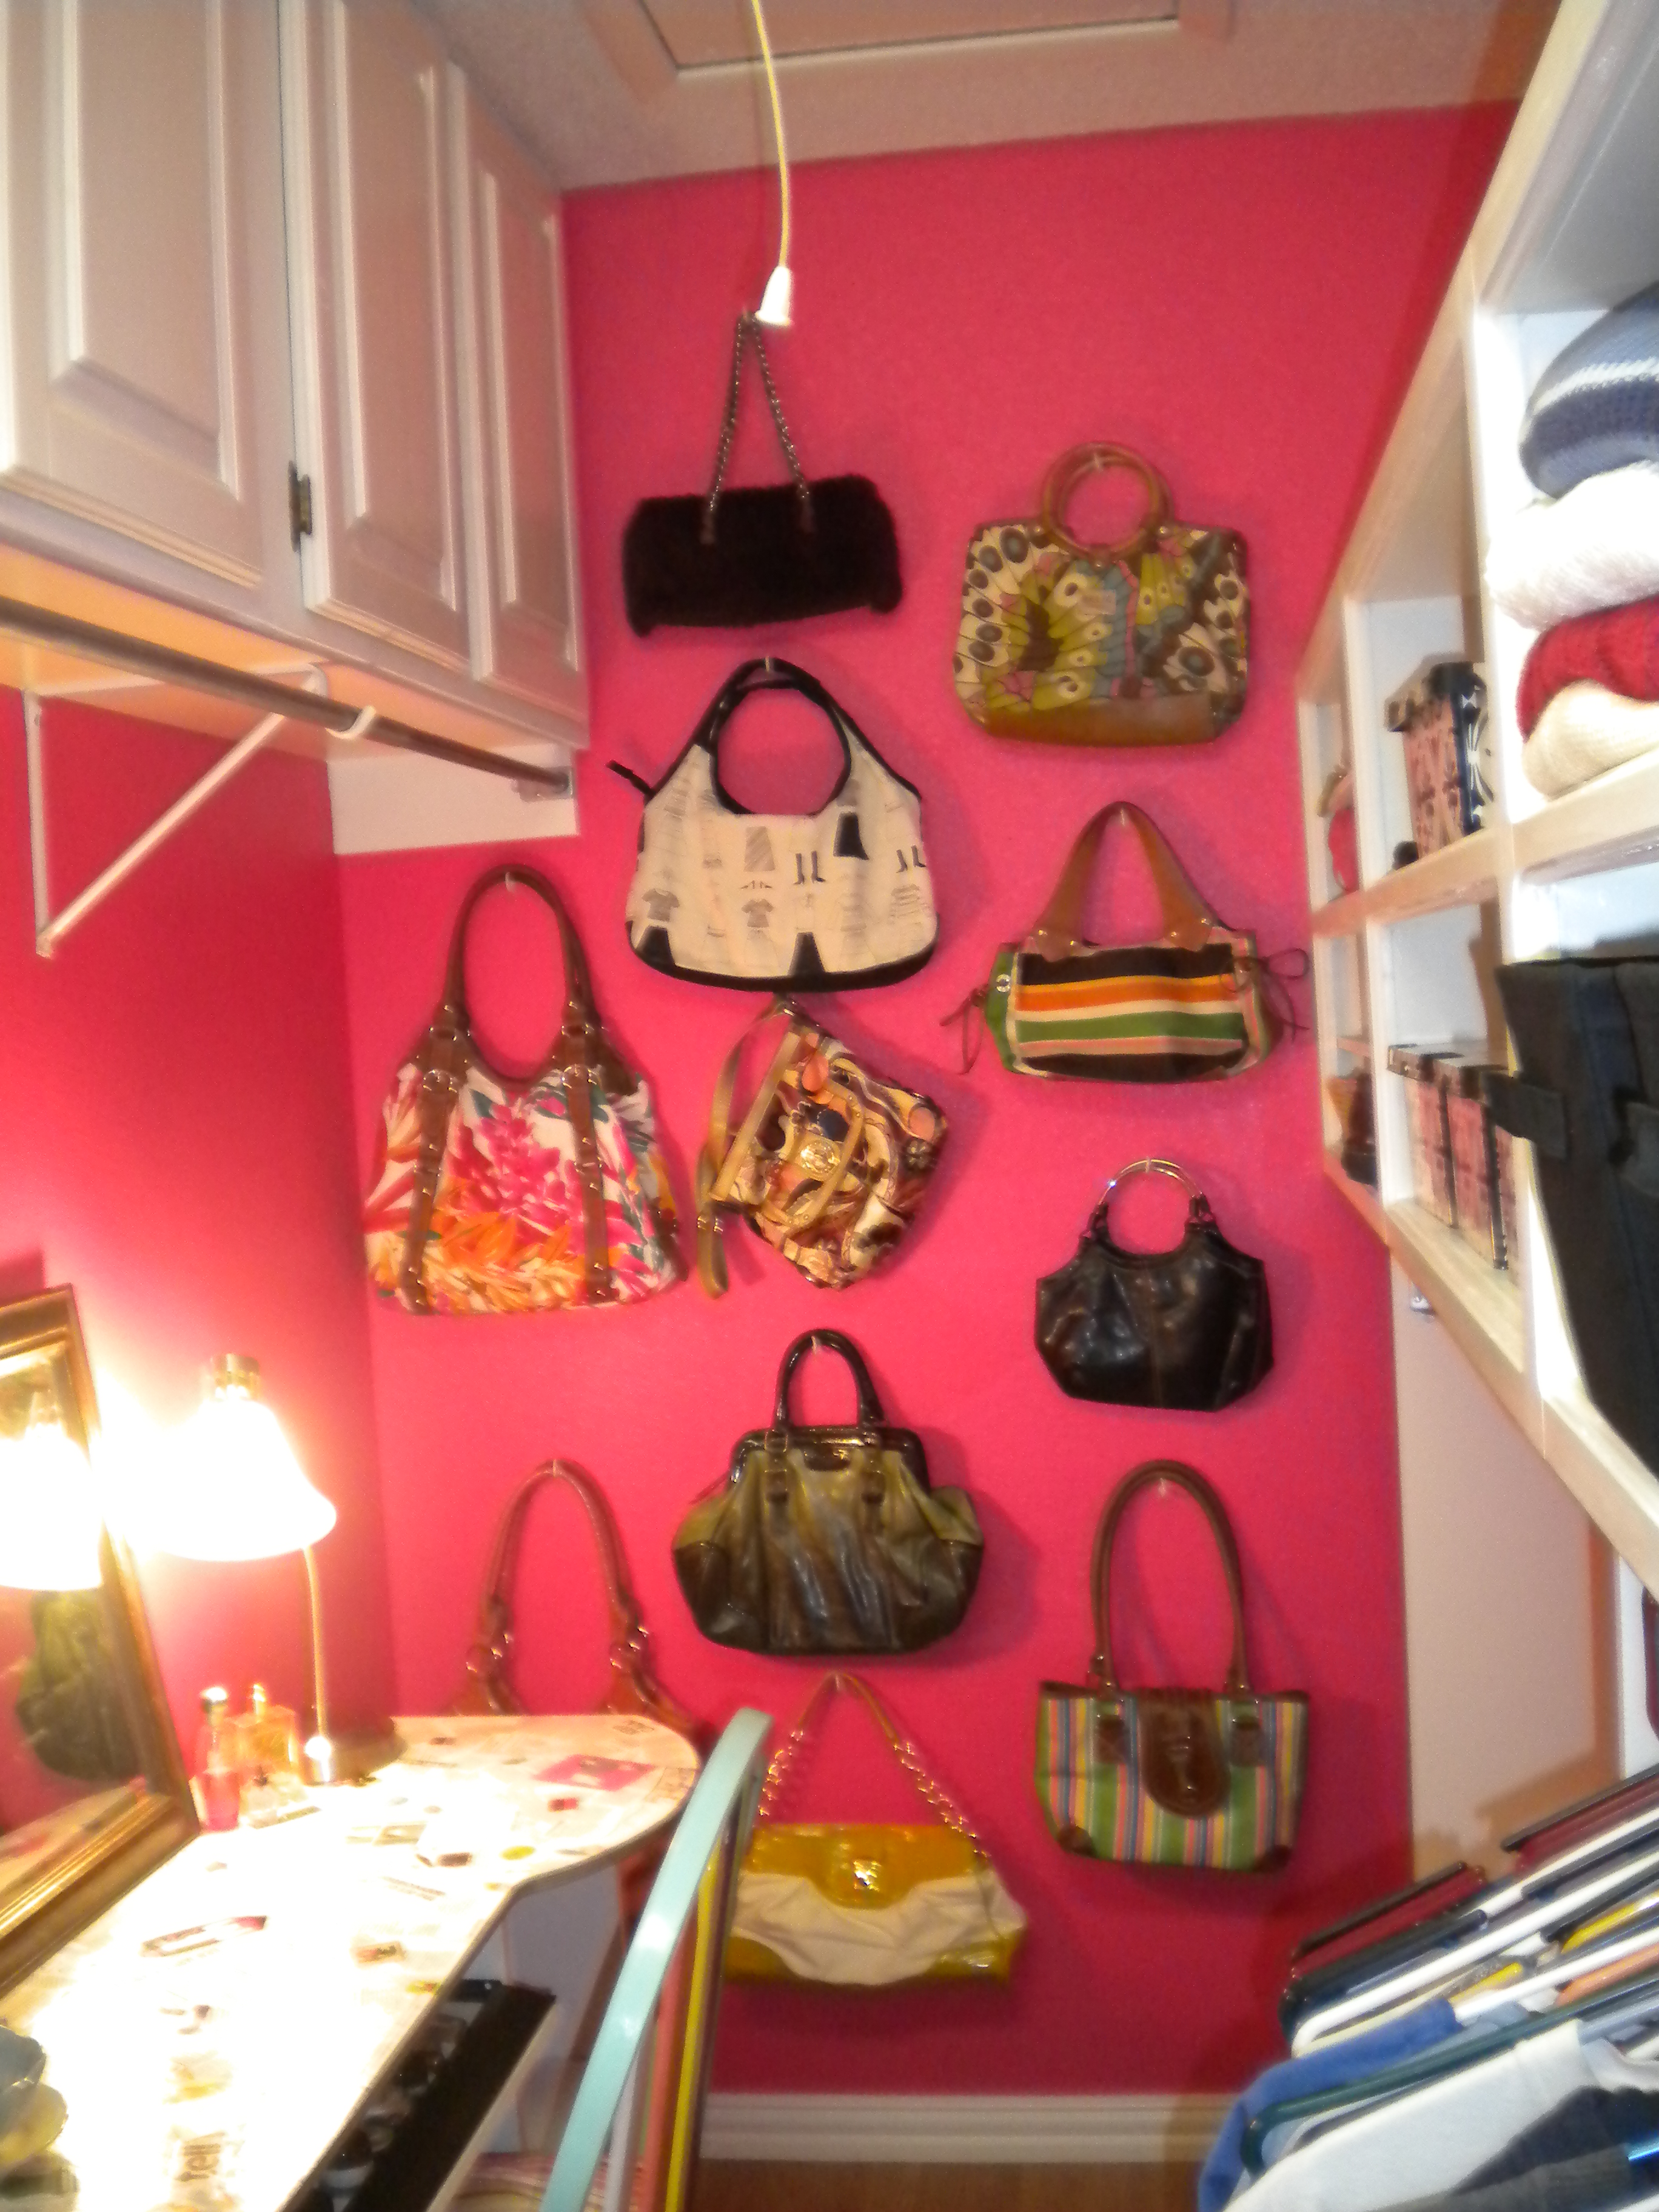
My closet After

Here are other things I did in my closet to keep things organized and handy:
* I installed hooks on the far wall to hang my favorite purses. These hooks are called Ook Hooks and I got them in two packs at Home Depot for $2 a pack. They just screw into the wall, no tools needed.

* I installed more Ook Hooks near the door to hang up my scarves and necklaces.

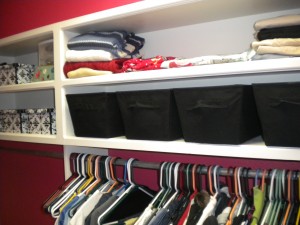
* I took out my bulky dresser and bought black canvas bins from Walmart ($5 a piece) to hold my smaller clothing items.

* I stacked my sweaters (which had been in the dresser) on the shelves.
My Closet After

Here is what I spent in my closet:
$35 paint
$20 black canvas bins for clothes
$20 Ook Hooks
$15 lamp

Not only do I have a bright and cheerful dressing room, I can find everything I need in a matter of seconds. It has also kept the bathroom counters clean because I no longer do my hair or make up in there.

My next project is my husband’s closet. Check back soon to see how I organize and liven up his small space.

Organizing Tips from a California Artist

Organizing Tips from a California Artist

Jana Botkin Oil Painting

Jana Botkin has given us many organizing tips already. If you missed her interview just go back to the Organizing section of this site and you’ll find her interview below this post. Jana is an artist in California who tries to live a simple lifestyle. You can check out her website here http://www.cabinart.net . If you’d like to see what’s in the mind and life of an artist you can follow her in her blog here
http://www.cabinart.net/weblog/

Below, Jana shares some more tips and ideas on how to stay organized and how to live a minimalist lifestyle. Enjoy!

1) Water in a spray bottle applied lightly to a cloth works better than Pledge.

2) I use soap.com for all of my toiletries. If you spend $40, the shipping is free. Their prices aren’t dirt cheap, but they do have sales and coupons. Besides, it’s worth spending an extra dollar on an item to avoid going into town (Jana lives in the foothills of the Sierra Nevada Mountain Range. A trip to town is almost a 2 hour round trip).

3) A friend told me that once a month she has an Eat-From-The-Freezer week. Brilliant!

4) I have two boxes of Christmas decorations. If something new comes in, something old gets tossed. The lids must fit.

5) Only keep one box of gift wrapping supplies.

6) Conditioner that you don’t like is great for shaving your legs with!

7) Only keep two sets of sheets per bed – 1 for summer and 1 for winter.

8 ) New clothing purchased must match something I already own.

9) If you don’t read ads, then you don’t start thinking you need things.

10) Never tell anyone that you collect something. When word gets out that you like a certain thing, it will start to come in. It can get overwhelming quickly.

There you have it! More insightful advice. I have to agree with the last one. I decided to collect something years ago and told a few people. One person (who was trying to be nice) bought me tons of these little things. First of all, it totally took the fun out of collecting something, and secondly I didn’t know where to put everything. What’s nice about collecting something yourself is you can add to your collection slowly. You can find room for things as you go.

I’m also going to try the Eat-From-Your-Freezer week. I know I have things in there that need to be used up.

I hope Jana’s advice was helpful. It’s always interesting to see how other people live and try to keep things to a minimum. Don’t forget to check out her website http://www.cabinart.net

Interview With A California Artist On How She Stays Organized

Interview With A California Artist On How She Stays Organized

Jana Botkin Pencil Drawing

I recently had the pleasure of interviewing a very talented artist in California (seriously, she’s freaking amazing). She lives in the foothills of the Sierra Nevada Mountain Range and tries to live a simple life style. Her name is Jana Botkin and you can visit her website at cabinart.net. If you’d like to see inside the mind and life of an artist you can follow her on her blog.

One of the things that amazes me about Jana is how committed she is to living a simple life style. She doesn’t buy things she doesn’t need, and if she has something she doesn’t need or use anymore, she donates it. At the same time her home is cozy and feels inviting. She hasn’t taken such a steep minimalist approach that her house feels empty and cold.

Jana is very careful with her money and her tips reflect that. We could all learn something from this amazing and talented woman. Below is the first half of my interview with her. I think you’ll enjoy her honesty and sense of humor. I know I did.

I’ve been to your home and your studio and I didn’t see piles of paper anywhere. What is your secret?
I’ve developed the habit of sorting and tossing – while seeking a recipe, an address in my address book, a phone number in my studio, a book to read – any time I am looking for something, I take the opportunity to dump or erase the no longer viable things. There’s no need to turn it into an event – I just make it an ongoing habit.

That is a great idea! What about mail? How do you handle that?
I’ve been opening my mail by the trash for years – it’s a great help! It forces me to make decisions instead of putting those undecided items into a pile to be sorted and tossed later.

I know you enjoy reading. What is your advice on books?
The library is the best place to get books because then I don’t have to own them. The exceptions are business books that have things I need to refer back to again and also the novels by Maeve Binchy. Since she died last month I guess my collection is complete 🙁 Oh, and bible study books. We’ve become dependent on books and workbooks written by other people in order to study the Bible. What would I do without Beth Moore???

What about magazines?
Subscribe to nothing. Magazine articles are shallow and quickly outdated, and the ads just cause dissatisfaction. If there isn’t time to read it when it comes, it will multiply in the dark.

Ok, let’s talk about my favorite things! Shoes and purses!
If shoes hurt, rub, pinch, slop around the heel, make me trip, or in any way, ANY WAY cause me to hesitate before putting them on, they are GONE.

I should really abide by that rule. I have several in my closet that I just can’t wear because they hurt or slip off. What about purses?
I only own two purses: a Coach that I finally saved enough to buy in 1996 and a little Sack. Do they still make those? They are crocheted and lined. I have that one for when I dress up. I bought it on eBay for about a tenth its retail price!

So I’m guessing you don’t like to go shopping.
If you don’t use shopping as a recreational activity, you won’t see things to buy that you don’t really need.

Let’s talk about the Kitchen. That seems to be the biggest problem area in everyone’s home. How do you keep your kitchen so clean and organized?
No one-function-stuff is allowed in my kitchen. It has to perform three tasks or it is GONE. The exceptions are the juicer (which I use once a year for making jelly – *as a side note, Jana makes pomegranate jelly and it’s awesome!), the popcorn popper, and the blender. I don’t have woks, angel-food pans, bundt pans, nut grinders (a big knife works great), garlic presses (they are terrible to wash – use a big knife for that too), etc.

I know you like to knit. There is so much beautiful yarn out there. How do you keep yourself from buying it all of the time?
When I have an urge to buy more yarn, I sort through my stash. If I loved it enough to buy it a year or two ago and haven’t used it yet, I’ll probably still love it and will feel as if I have something new to knit with. I probably have three years of yarn, even while trying to be a minimalist. And I am, compared to other Knitters. “knitters” don’t have stashes- “Knitters” do. I am a Knitter. This principle of going through what you have that you may have forgotten about can be applied to anything – earrings, shoes, fabric if you are a quilter, tools, stationery, art supplies, colored tee shirts, etc.

Your house is so beautiful and cozy. Anything you want to share about your home?
My house is really out of style. If Perkins (Jana’s cat) dies, I will get a new couch. Then the rug will look wrong. Then the shabby stained armchairs will be pathetic. After that, the faded curtains will no longer be acceptable. But I’d rather have Perkins than a new couch. He is a couch destroyer, but the thought of being catless is incomprehensible to this childless woman!

There you have it! A look into the minimalist lifestyle of an artist. Do you think you could do it? I can hear my 30 plus purses crying right now. Hold on babies, mama’s coming. I lover her kitchen ideas and I really do need to follow her shoe rule. At this point many of my shoes have become decorations sitting on my closet shelves.

Friday Jana will be back! She will list her advice and other ideas so make sure to check back then! Oh, and don’t forget to check out Jana’s website and her blog http://www.cabinart.net/weblog/. See ya Friday!
Organize Your Inspirations

Organize Your Inspirations

We have planners to help us organize our to-do’s. We have journals to help us organize our thoughts and emotions. But what about your inspirations? How do we keep track of those?

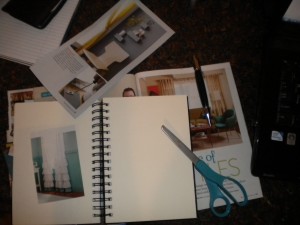
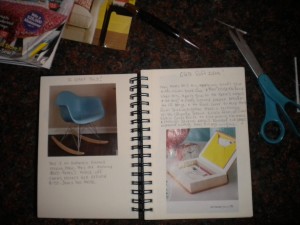
I like to keep an “Inspirations Journal”. When I look through magazines or catalogs and find something I like, I cut them out and put them in my journal. When I think of a painting I want to make I sketch it out. When I come up with an idea for my website or for a fun school project I write out all the details. I’ll even glue in small pieces of fabric that I like or glue on paint samples from Home Depot that I want to use somewhere. On top of that I like to add bible verses or quotes that I can refer back to when I need some motivation.

My Inspirations Journal

It’s a great place to write my ideas, my dreams, my vision. When I get down I can look through it and get a pick-me-up. When I feel motivated to do something but don’t know what I want to do, I can look through it and get ideas. It’s also fun to see how my style changes. Part of the journal might be filled with more modern things and ideas, while another part is full of all things shabby-chic.

If you’d like to start an “Inspirations Journal” here are a few tips:

1) Find a journal that is spiral bound. You can add photos and fabric to the pages with out them adding too much bulk and then breaking the binding.

2) Make sure the pages aren’t too thin. Many journals contain paper that is very thin and might not hold up well if you’re going to be gluing fabric or photos to them. I buy my journals in the sketch pad section at Hobby Lobby (with my 40% off coupon of course). This paper is nice and thick and holds up well to glue, plus it’s perfect to make sketches on.

3) Decide how you want to organize your journal before you start. Are you just going to add to it how ever you want with no rhyme or reason (this is usually how I like to do it), or are you going to divide it up into sections to make it easier to find things? You could decide to have so many pages dedicated to quotes and inspirational sayings, so many pages for ideas for each room of your home, or pages set aside for sketches, books you want to read, or things you want to buy. If you do it this way, I suggest you buy little post it note tabs and put them at the top of your pages so you don’t have to flip through each page looking for a specific section.

4) Have fun! Don’t restrict yourself. Part of the fun (to me anyway) is that I can write, glue, draw, anything I want. I don’t add to it every day, only when inspiration hits.

5) Decide if it’s going to be a private journal or one you don’t care if your family picks up and flips through. If it’s private, keep it somewhere your family will not likely find it.

I love my Inspirations Journal. Mine is small enough I can keep it in my purse or throw it in a drawer. It’s nice to have my thoughts and dreams in one place. I enjoy looking back to see what I’ve added in the past and be reminded of projects I’d like to do. I can finally put all of my “great ideas” in one place!

Journal

Make a Desk for Less

Make a Desk for Less

My husband and I do a lot of work from home. We only had one desk and it was frequently in use by one of the kids. We knew we needed another work space but we didn’t want to buy two more desks (one for each of us). We came up with an idea – we would make one large one!

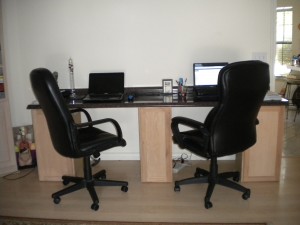
Home Made Desk

We went to Home Depot and bought an eight foot long laminate counter top. We then bought 5 “upper” cabinets in the kitchen section. Why did we choose “upper” cabinets instead of “lower” ones? The lower ones would be too tall. Our desk would end up being as tall as our kitchen counter – that would only work for us if we sat on bar stools. That’s not very comfy for long periods of time.

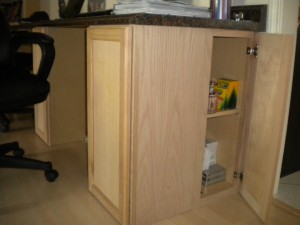
My husband put the desk together by sitting the counter top on top of the cabinets. He screwed the counter to the cabinets (from the inside of the cabinets). He also screwed the two side cabinets together. We have two cabinets on each end (one facing to the front and the other facing out). One cabinet was placed in the middle. Not only do we have a durable work surface (I can put my icy drinks on it and not have to worry about it leaving behind any rings) we also have tons of storage.

How much did this 8 foot long desk cost us to make? The cabinets and the counter top together cost $300. That’s not bad! You can make a smaller version by purchasing a smaller counter top. They had 6 foot sections available also. Or you can make a larger one. Our Home Depot had a 10 foot long counter top.

Desk from the side

Organize Your Bills

Organize Your Bills

I have used bill organizers for a few years now and I don’t know how I ever stayed organized before them (I probably didn’t). Not only is there space to write down your monthly bills and when/how you paid them, there is also a pocket for each month to keep your bills in. This is a must have for anyone who wants to keep all of their bill and receipts in one place.