Category Archives: Design

Stripes in the Living Room

Stripes in the Living Room


I love stripes. I made wavy ones in my daughter’s room to match a room we saw at the Paradise Pier in Disneyland. I made stripes along the soffit in my kitchen to pull all the colors in my kitchen together. But my favorite stripes so far are the ones in my living room.

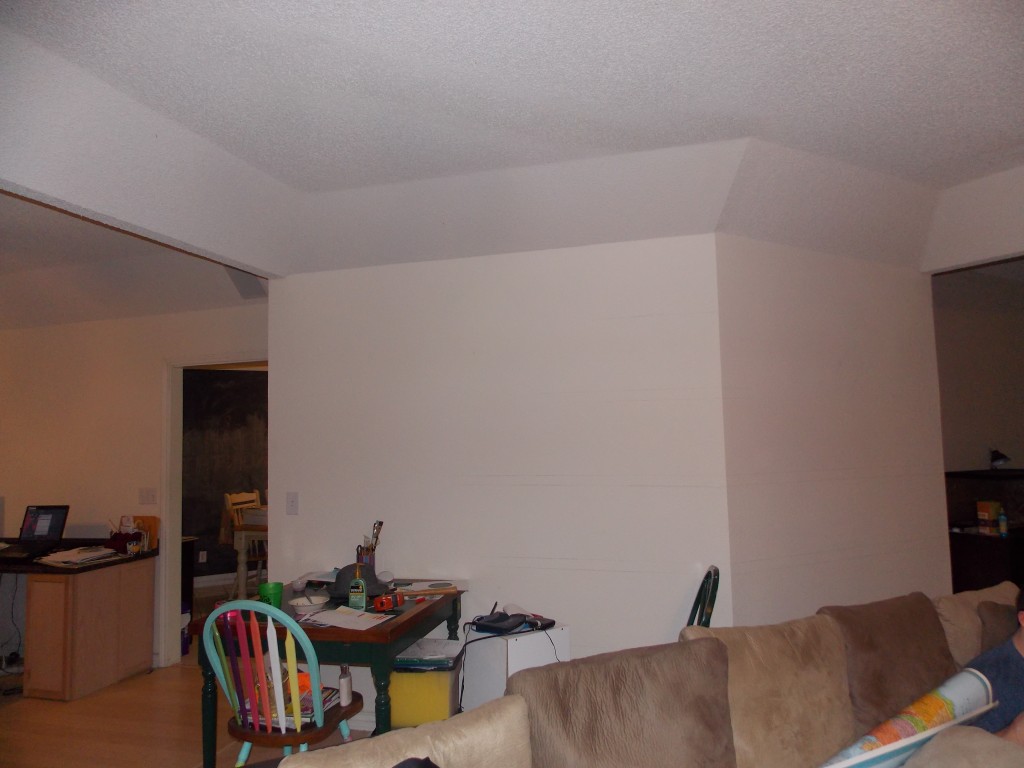
I have a large living room that is all white. It was one of the few rooms I hadn’t painted yet. I wanted to paint it, I just didn’t know what color I wanted it to be. I kept buying those little sample containers of paint at Home Depot and Lowes so I could try out several colors. One day I walked by the wall with all my paint samples on it and decided I liked all the colors!

Living room before stripes

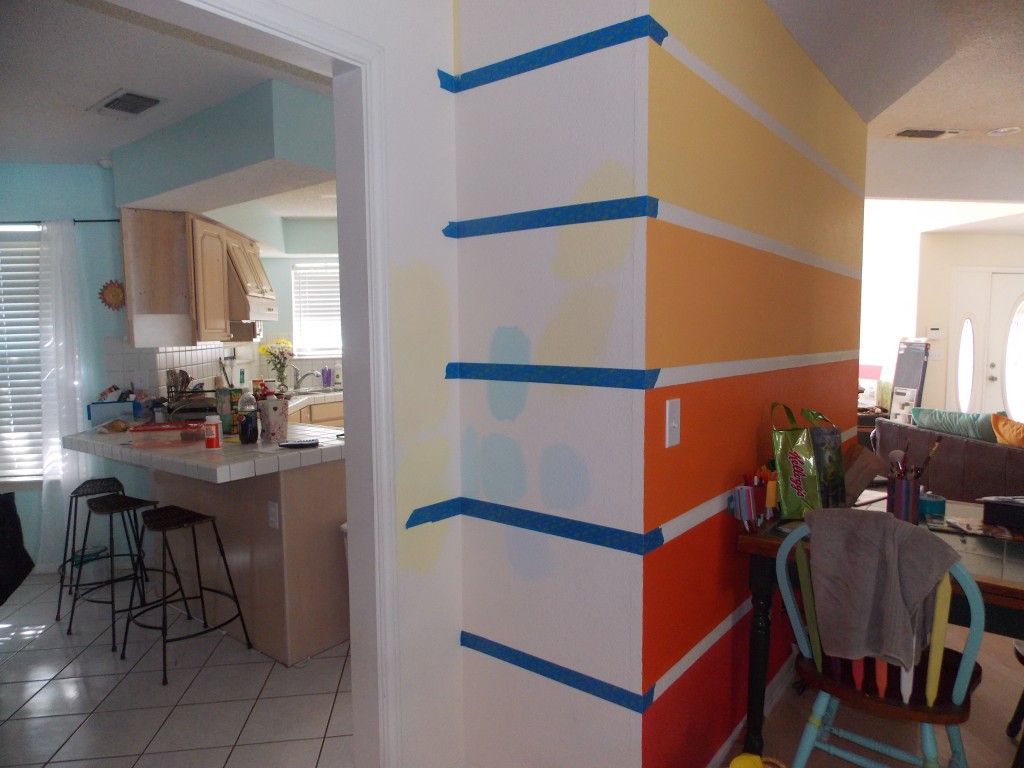
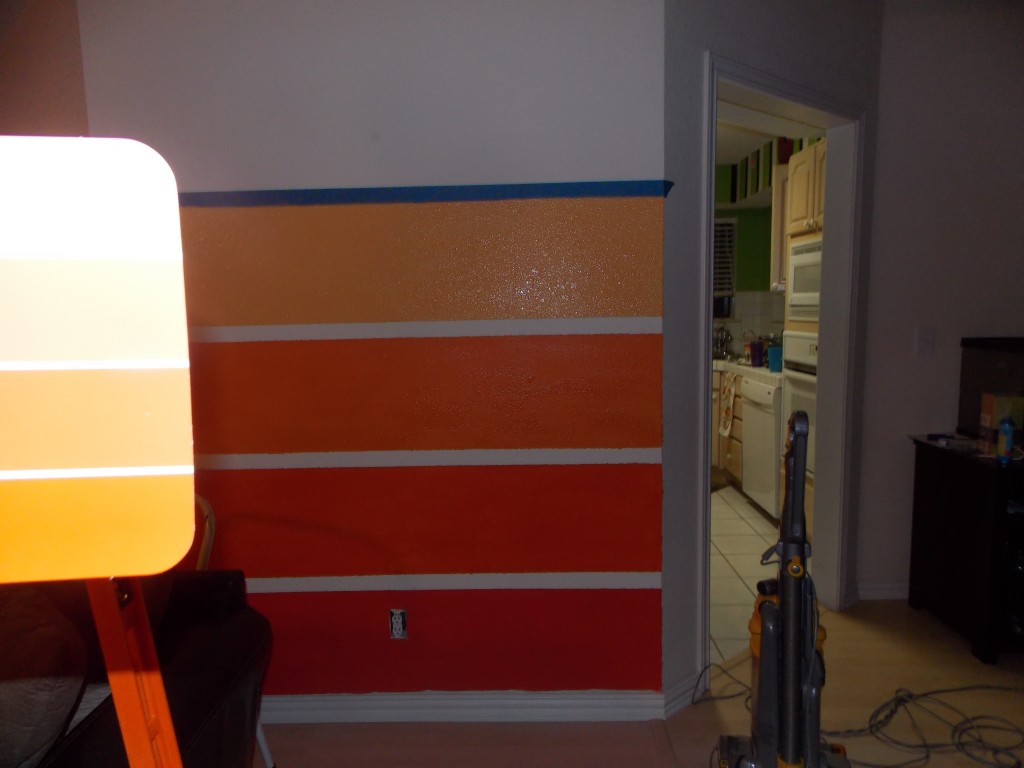
I decided to make stripes on just one wall. I would start with the lightest color and work my way down to darker colors. After four stripes I thought the wall reminded me of something…but what? I stepped back and took a good look at my work. Then it hit me – I had just painted one of those paint sample cards!

Looks like a paint sample card!


I almost stopped right there but I decided to continue on and finish the project. After it was finished I would repaint it if I didn’t like it. But it turns out I love it! It’s bright and fun! It’s just what the room needed!

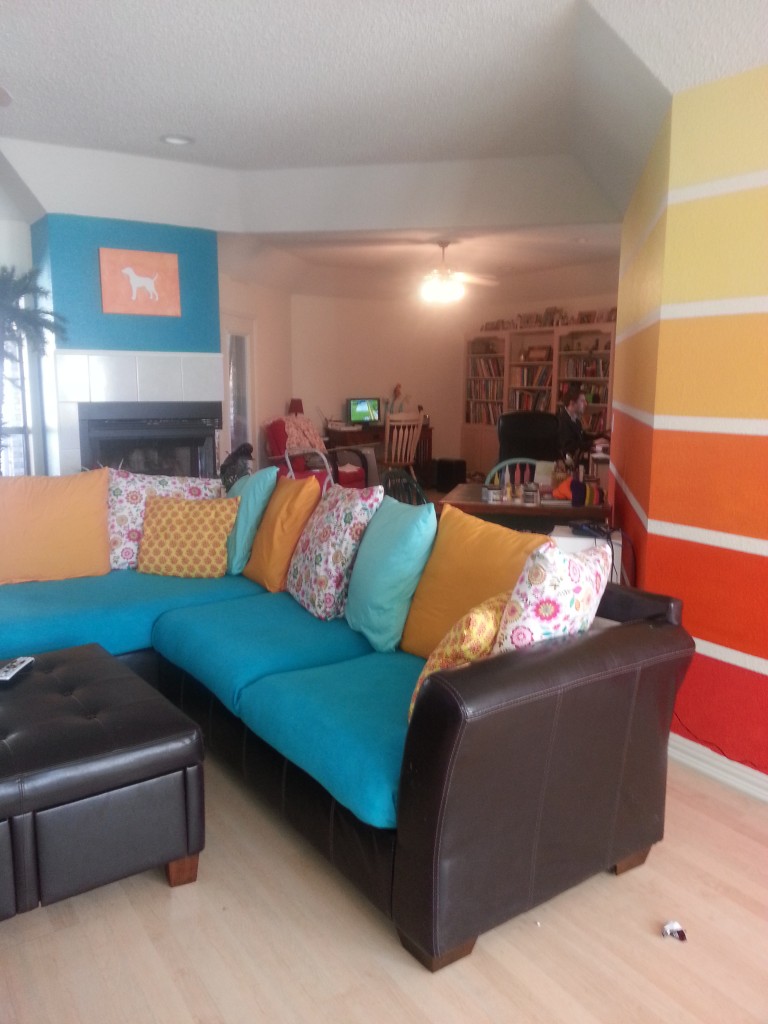
Unfortunately once I re-do something in a room it makes other things look bad. My brown couch looked terrible against the bright orange and yellow wall. I had to change it. Since buying a new couch is out of the question right now I had to work with what I had. I bought fabric at Hobby Lobby and make pillow cases for the pillows all along the back of the couch. I decided on pillow cases instead of completely sewing the pillows in their new cases so I could remove them easily if they needed to be washed. I just tuck the extra fabric behind the pillow. I bought teal blankets at Target and tucked them into the couch.

Making the stripes


Once that was done, the fireplace looked a little sad. I painted that a teal color that is similar to the couch. My 11 year old daughter made the cute painting above the fire place. Click here to see how she did it. My once blah, white living room is now bright and lively. Every time someone walks in the front door they see it and want to come in further to get a better look.

Paints I used from top to bottom:
Peach Tickle – Valspar
Butterscotch Cream – Valspar
Juicy Cantaloupe – Behr
Dragon Fire – Behr
Volcanic Blast – Behr
Fairmont Suite Clay – Valspar
Fire place – La Fonda Turquoise – Velspar

Inexpensive Fix For Ugly Kitchen Tiles

Inexpensive Fix For Ugly Kitchen Tiles

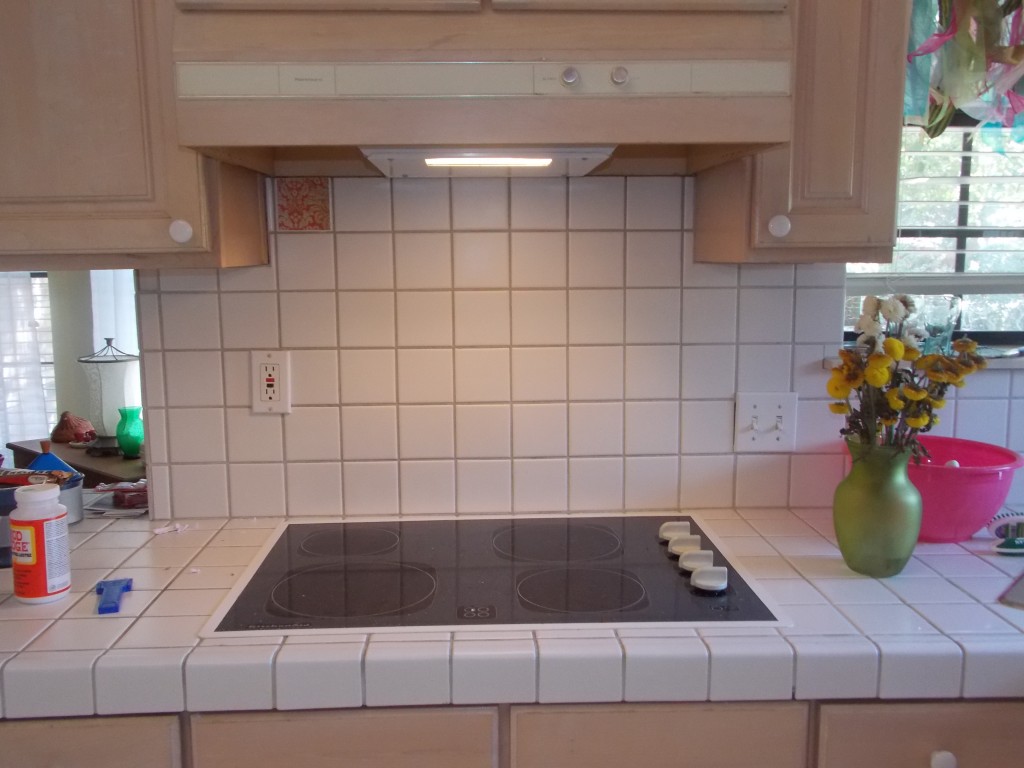
Back Splash-Before


I have a tiled counter top and tiled back splash in my kitchen and I really don’t like it. It’s so plain and…well, ugly. I would love to rip it all out and do something totally different but I don’t have the time or funds right now to take on a project like that. Instead I did…are you ready for this…Mod Podge!

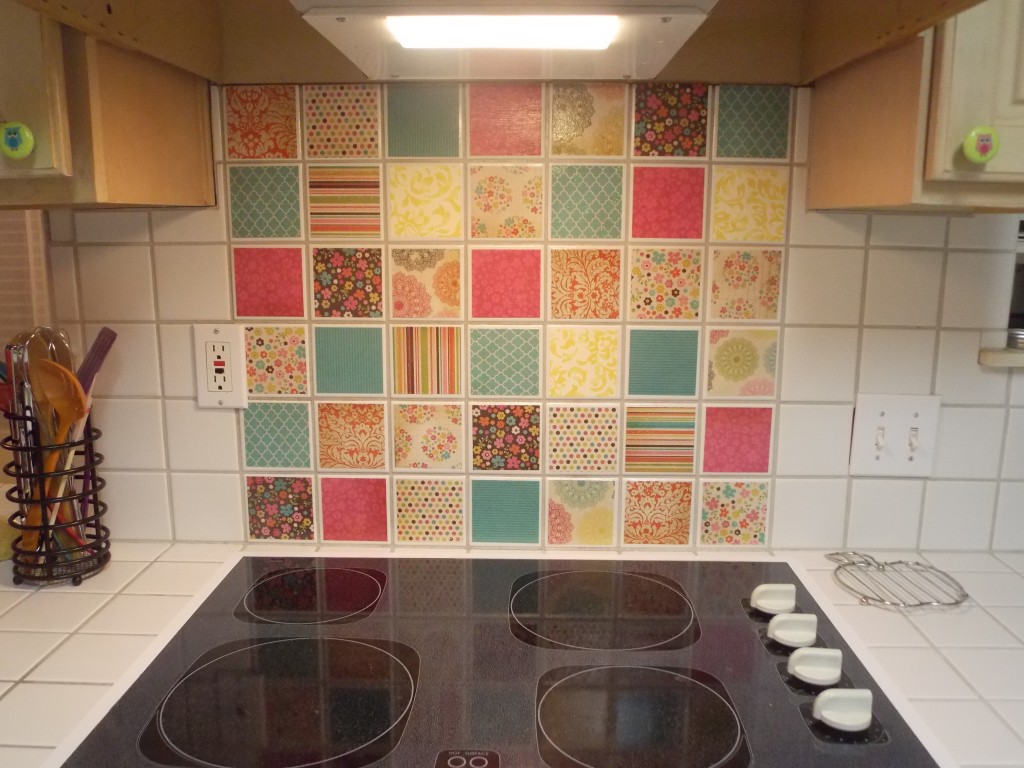
Yep, with some beautiful paper and some Mod Podge, I completely changed the way the kitchen looks. Here’s how I did it:

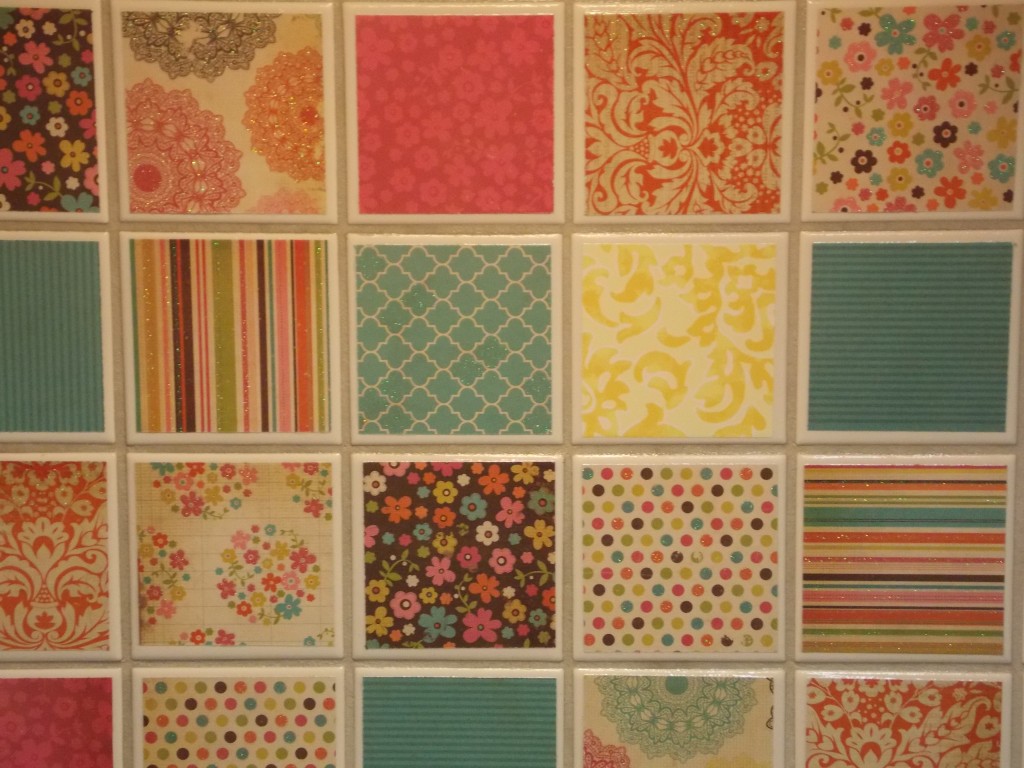
My tiles are 4×4 inch tiles. I bought some beautiful different patterned papers at Michael’s (It came in a pack called Fabulous Girl). I cut the papers into 3 1/2 inch squares because I liked having a white border around each paper instead of covering the entire tile. I wanted to test out my pattern so I used poster putty to attach the papers to the tiles. That way I could get an idea of what the finished product would look like before I made it permanent.

Once I decided on the pattern, I began the Mod Podging. I used a small brush and put a thin layer or Mod Podge on the tile, then carefully centered the paper and pressed it on. Normally when I use Mod Podge I put another layer on immediately but I found that when I did this to the tile it bubbled a little. If I waited a little while (until the underneath layer was dry) and added a top layer of Mod Podge it didn’t seem to bubble.

Back Splash-After

I added several layers of Mod Podge (waiting for each coat to dry before I added another one). Once it was dry for at least 12 hours I added a clear latex paint to help seal it and take away the tackiness. I waited a few hours until that dried and added one more layer for good measure. This also helps ensure that when I wipe down the tiles my cleaners won’t eat through the Mod Podge and damage the paper.

Back Splash-After (Close Up)

This entire project was very inexpensive. I used 6 sheets of paper to do the tiles above my stove. I used 2 sheets to do the back splash on the other side of the kitchen. The sealer cost me $10 at Home Depot and I only used a small portion of it.

Of course I enjoyed the process so much I couldn’t stop there. Click here to see what I did to the kitchen cabinet door knobs!

Redoing Cabinet Knobs with Mod Podge

Redoing Cabinet Knobs with Mod Podge

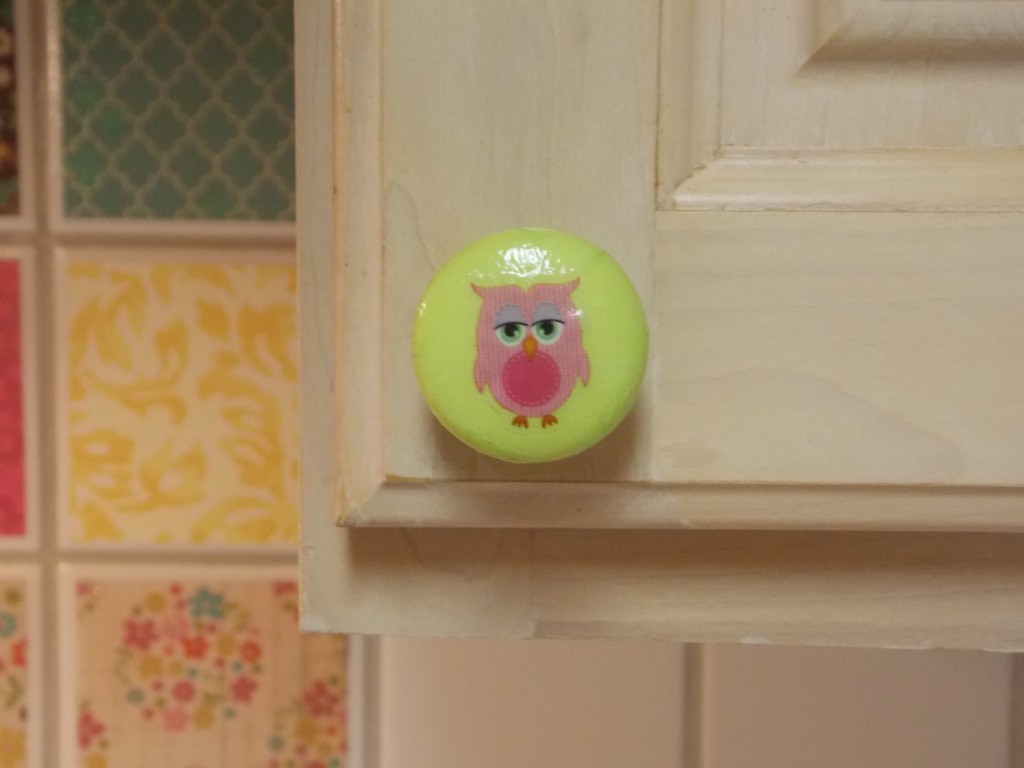
Isn't he cute!


Mod-Podge is so much fun! I just finished a project using Mod-Podge and paper to jazz up a tile back splash. Click here to see that project! The problem is, once I get started using that stuff I can’t stop!

I had 40 plain, white cabinet knobs in the my kitchen that were just BEGGING for some color. I bought a package of green tissue paper from Walmart for 92 cents. I did ALL 40 knobs and didn’t even use half of the package of tissue paper! Can you believe that?!? It’s true! This has to be the cheapest project I’ve ever done.

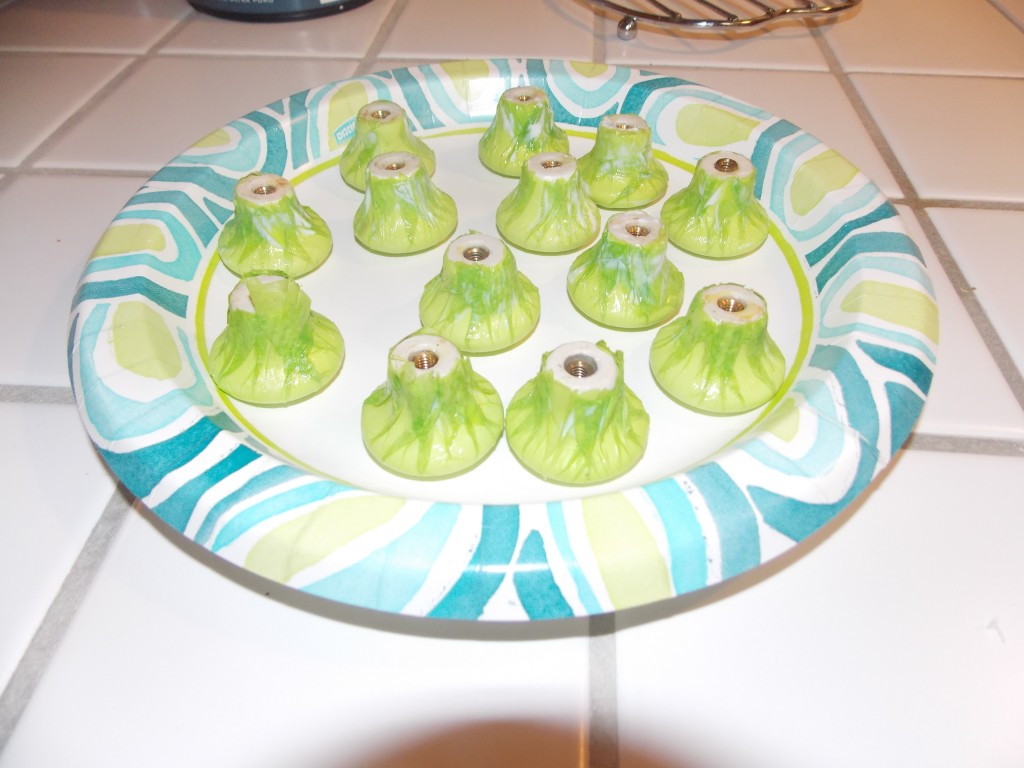
First I made sure all the knobs were clean and dry. Then I cut out a 3 1/2 inch square of tissue paper. I brushed the Mod-Podge on the knob and stuck the paper on immediately. Then I smoothed the paper over the top of the knob and carefully folded it around the base of the knob. Once the paper was on I added a layer of Mod-Podge to the base of the knob only. That way the knob could sit on a paper plate upside down and dry without it sticking to the plate. Once I finished with all 40 of them, I turned them over and painted the tops of them with Mod Podge.

Drying cabinet knobs


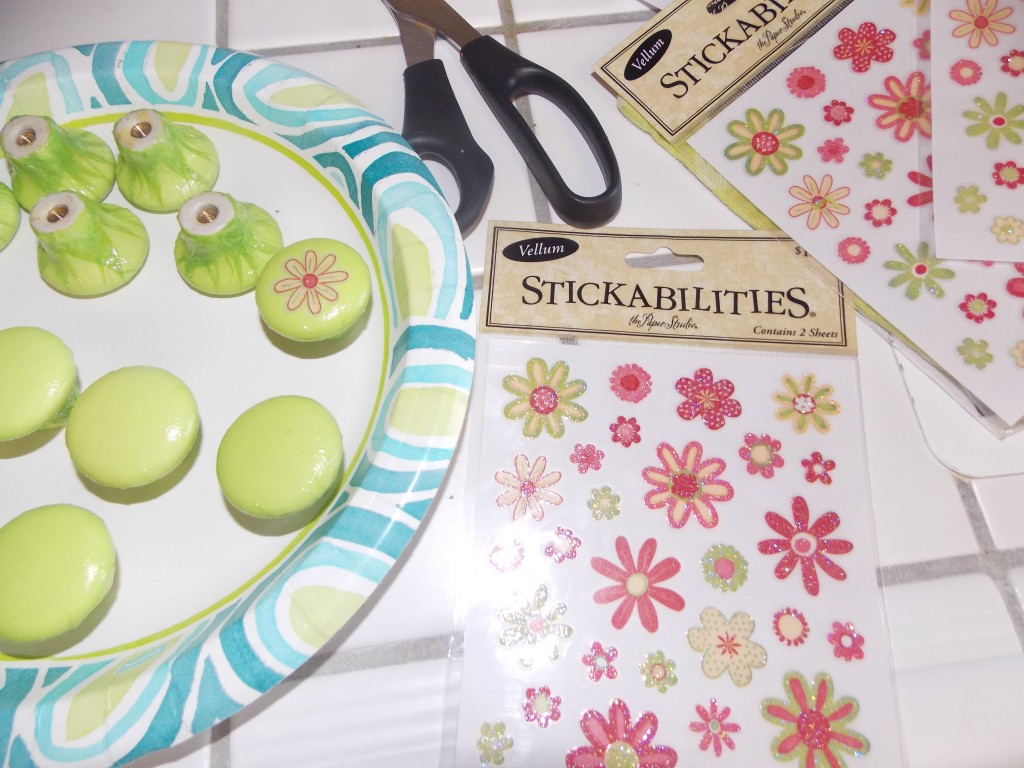
Because these knobs will be handled often I put several layers of Mod-Podge on the base and top of each knob. I probably put 7 or 8 coats on each one. About half way through this process I looked at my beautiful green door knobs and thought to myself “Self, they are cute the way they are…but they need a little somethin’ to jazz them up”. So I ran out to Hobby Lobby and bought some small stickers. I put the stickers on each knob, making sure to push out any air bubbles and immediately adding a layer of Mod Podge to each one. After each one had a sticker they got several more coats of that magical glue/sealant. If you’re going to use stickers make sure the knob all ready has a few coats of Mod Podge. When the tissue paper is glossy you can reposition the sticker if you have to. If you put it directly on the tissue paper, without make it glossy first, that sticker isn’t going anywhere. If you try to remove the sticker, you’ll tear the paper. When I was satisfied with them I added a layer of clear latex paint just to be on the safe side.

Adding the stickers

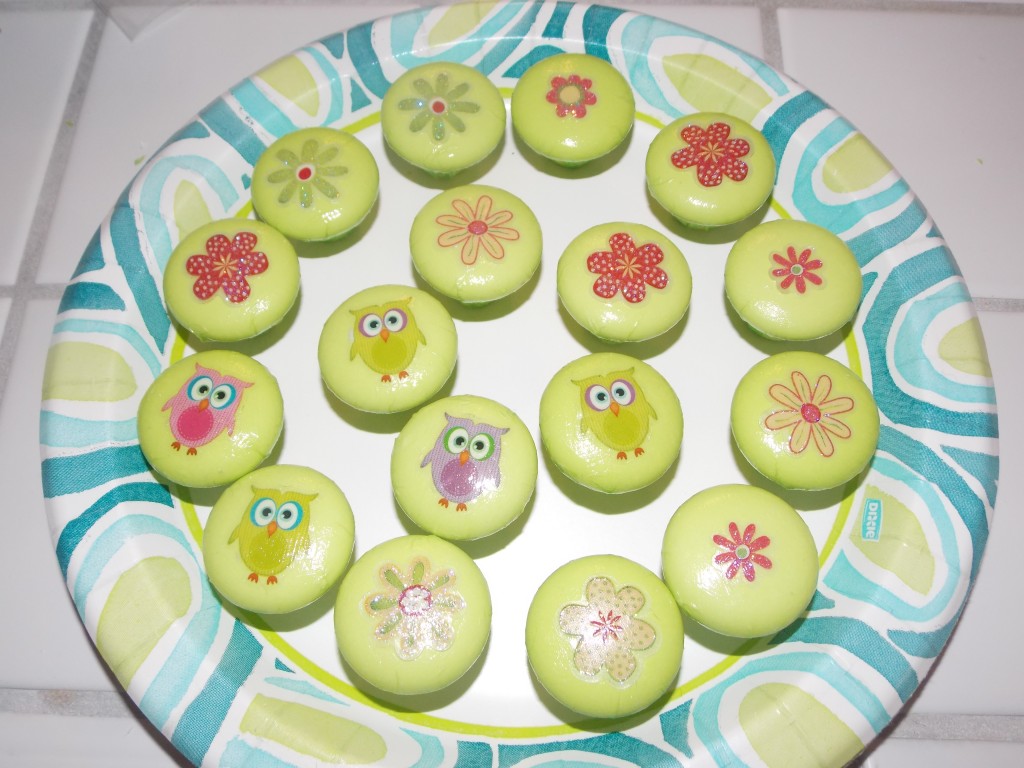
Finished cabinet knobs with flowers and owls


I let them dry for 24 hours and then put them back on the cabinet doors.

I’m so happy with how easy and super cheap this was. The stickers were 50% off so it only cost me $2 for the owls and flowers. Aren’t those little owls cute!!

Liven Up The Living Room With Color

Liven Up The Living Room With Color

Living room before stripes


White – Every thing in this house was white when I first moved in. It has taken me a year but I’m down to two white rooms, and with any luck, they won’t be white by the end of the month.

I love color…and I love to paint. One of my sisters jokes with me that it isn’t so much that I love painting as much as it is that I’m addicted to the fumes and couldn’t stop painting if I wanted to. Another sister jokes that every year I actually lose square footage in my home because of all the layers of paint on the walls. She may be right – I’ve painted my kitchen three times since October (3 colors in 10 months).

I decided to add stripes to this room to make one of the walls really stand out. After I finish a project with stripes I always tell myself I’ll never do stripes again. But, I’m a sucker for stripes. I love them. They are really not that hard to do. It just takes time, some good painters tape, and a level.

Making the stripes

Now look how bright and colorful this room is! I love the stripes and the turquoise around he fireplace. I love the pillows (which are actually just simple pillow cases I made for the pillows that came with the couch). Instead of buying a whole new couch I bought micro-fiber blankets to cover the micro-fiber cushions. Both the pillow cases and the blankets can easily be removed at the end of the week for a good washing.

Living room after

I love when people come over to my house and see all the colors – their eyes light up and they want to walk right on in. This room makes me happy and I love that it makes other people happy too.

P.S. See that adorable dog painting above the fireplace? My 11 year old did that! Click here to see how it’s done and make one for yourself!

My Black Bathroom

My Black Bathroom


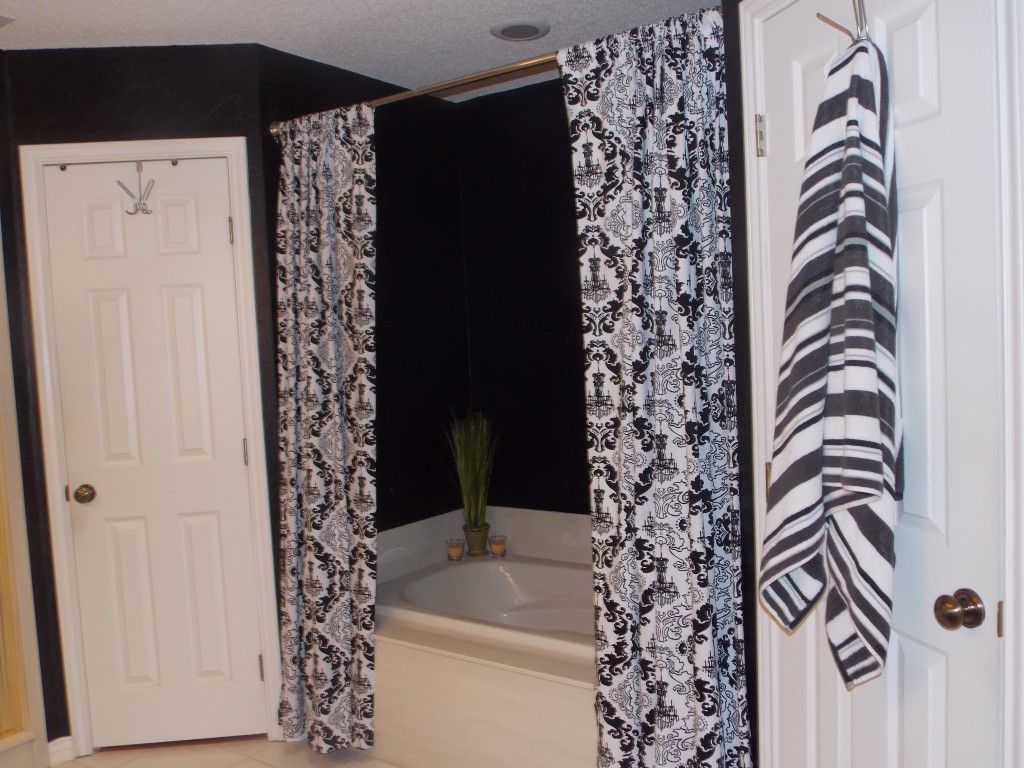
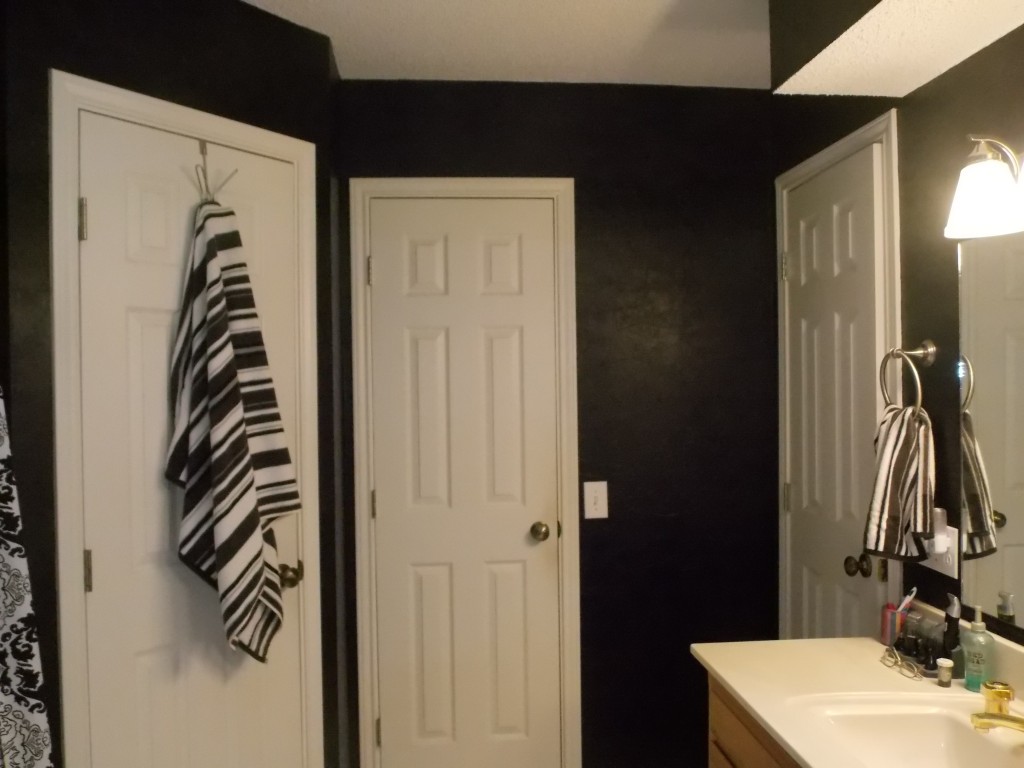
My master bedroom is a light green color. I wanted my master bathroom to be just a few shades darker. After 6 different shades of green samples painted on the walls (all of them hideous) I decided to rethink the green. Maybe I didn’t like the green samples because in my heart I knew I didn’t really want green – I wanted black. Could I convince the husband that a black bathroom would be awesome? I called him in there and broke the news to him gently. Thankfully he just shrugged and said to give it a try. I love that man. He’s used to my crazy ideas but even this felt a little over the top for me. Before either one of us could change our minds I rushed out and got a black paint from Lowes.

Here’s why I thought I could pull off black walls in my bathroom:
* All of my trim in the bathroom is white.
* The bathroom floor is white.
* I have a sky light. You don’t have to have a skylight to use black in a room, just make sure you have plenty of light from some source. If your bathroom lights aren’t bright enough consider replacing them.
* I used a satin paint instead of a really glossy paint. The glossier the paint the more it shows imperfections. Stick with either satin or a matte finish.
* I used a few yellow items in the room to brighten things up a little.

I love to paint and I think out of all the rooms I’ve painted, this one may be my favorite. The room is beautiful and comfortable. Plus our his and hers closets look fabulous with the black. To see our closets check out here (my closet) and here (my husband’s closet).

Adding Storage to Your Bed

Adding Storage to Your Bed

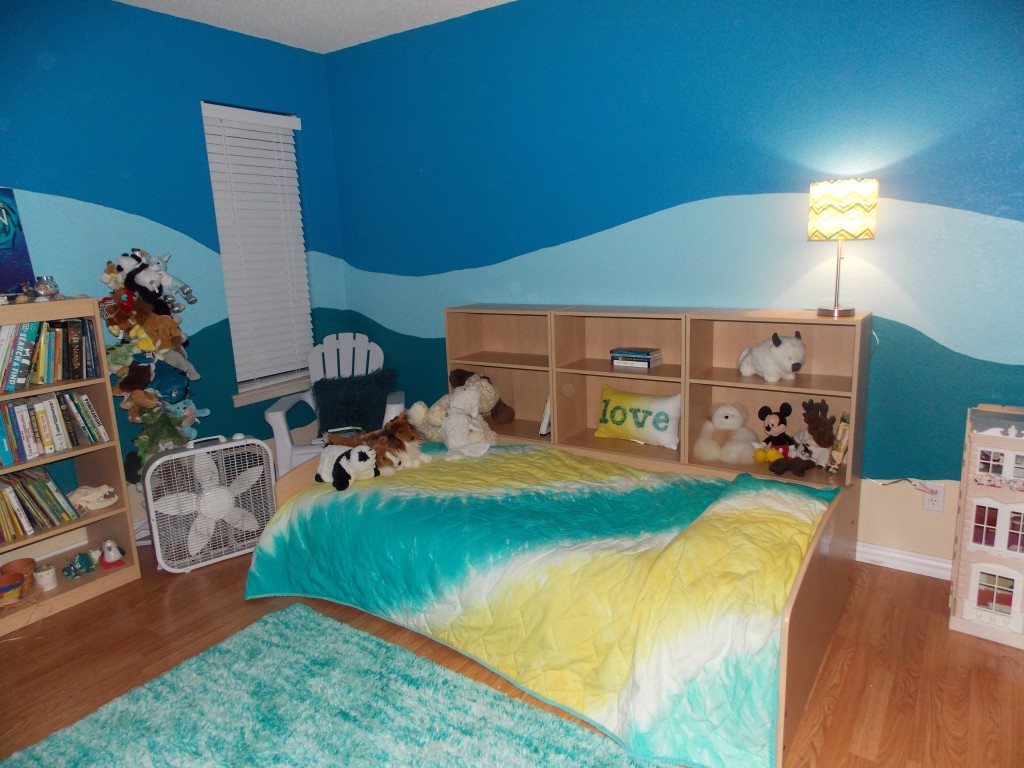
My 11 year old tells me one afternoon that she’s tired of her bunk bed and she wants a new bed – one lower to the ground so she doesn’t have to worry about hitting her head on the ceiling. We make a trip to a local furniture store and of course she picks out the most expensive bed they have – a beautiful single bed with lots of shelves along the back side of it. I really wanted to buy it for her but the $1000 price tag (not counting a mattress) was just a bit too steep for me. I took a picture of it and told her I was sure we could somehow make something similar for a lot less.

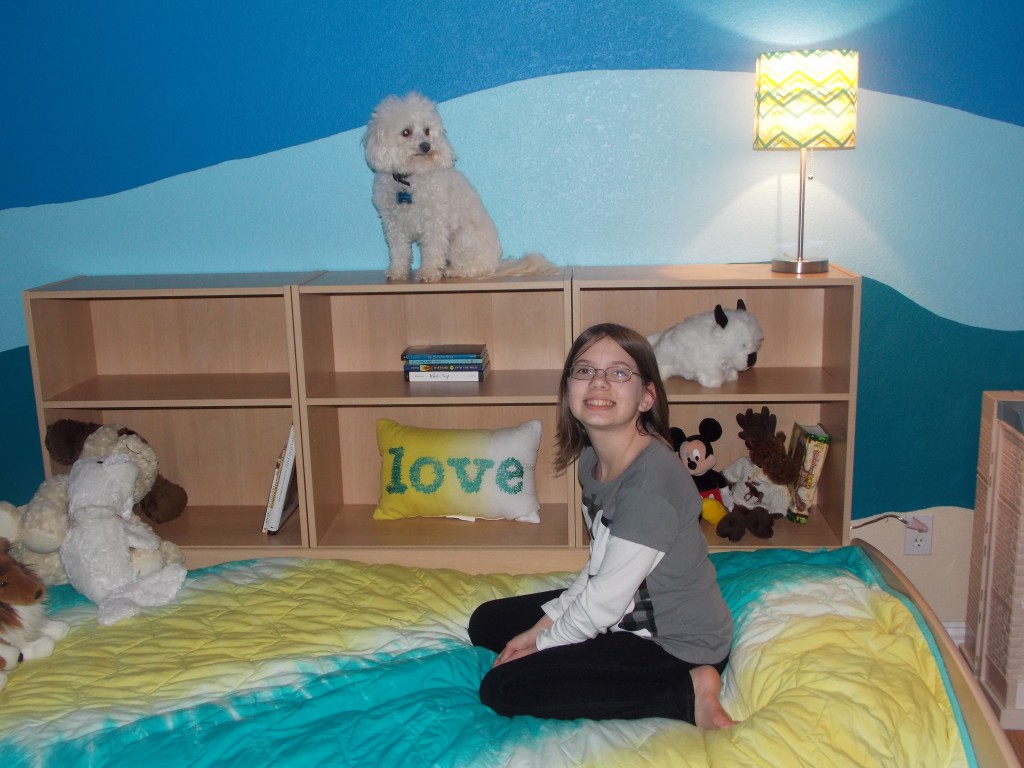
I came home, ate some peanut M&M’s (those help me think better), and came up with an idea. I was so excited I got started right away. I took apart her bunk bed and used one of the bunks. I went to Target and bought three short bookcases the same color as her bed. I lined the bookshelves against the wall and put her bed in front of it. Ta-da! Same concept as the $1000 bed but it only cost me $68!

Not only was it much cheaper but it has another benefit as well. The bed blocks the bottom shelf of all the bookcases but we are still able to use them as storage. She puts things on the bottom shelf that she wants to protect or doesn’t want to get rid of yet. If she ever needs them she can just pull her bed out to get to them.

If you make this yourself keep in mind that different stores sell different size book shelves. The book shelves I got at Target are taller and skinnier than the ones our Wal-mart sells. My three bookshelves were about an inch shorter than the bed but it doesn’t matter – you can’t tell.

She’s one happy little girl. She has a beautiful bed that contains lots of storage. Even the dog likes it 🙂