Monthly Archives: July 2012

Make Your Own Powder Carpet Deodorizer

Make Your Own Powder Carpet Deodorizer

I love a house that smells good! I used to use a lot of room sprays and carpet deodorizers until they started to bother my daughter. Something in them was causing her eyes to itch and made it hard to breathe (who knows what kinds of chemicals are in those things). I decided to start making my own.

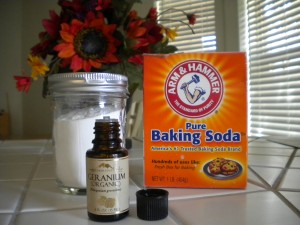
It turns out that making your own carpet deodorizer is VERY simple. All you need is an empty jar with a lid, baking soda, and your favorite essential oil. You can buy essential oils from your favorite health food store or from Mountain Rose Herbs (there is a link for them at the bottom of this article). For more information on essential oils, check my last article about adding essential oils to an all-purpose, make at home, kitchen spray.

Put one cup of baking soda into a jar, add 20 drops of your favorite scent (I added 1/4 cup baking soda and 5 drops of oil and then kept repeating in this pattern to make sure the oil was all throughout the jar), shake it up and let it sit for 12 hours with the lid on. There ya go! It’s done! Sprinkle a little on your carpet or furniture and let it sit for a minute or two and then vacuum it up. Today my house smells like Geranium Rose. I think when I run out, I’ll make a lavender one next!

Mountain Rose Herbs

Using Facebook To Sell Things

Using Facebook To Sell Things

In my book, Border Hoarders, I talk about the many places you can take your unwanted things. Facebook never entered my mind until I was on there today and I saw a friend list several things she wanted to get rid of. My home page was flooded with pictures of items she no longer wanted, along with a description and price she wanted for each one. I kept an eye on them through out the day and I was surprised to see how many people actually wanted these things! There were several items that even had more than one person wanting it!

If you have a lot of friends on Facebook, this can be a great way to sell things you don’t want – and it’s free! After seeing how she did things, I’ve come up with a few tips for you in case you want to try this yourself:

*Take a good picture of each item.
*Make a new post for each item.
*Give each one a good description.
*Either list the price you want or let people know you’ll take the best offer.
*Wait until you have several items that you can put up all at once. If you do a little at a time, day after day, people might get annoyed and unfriend you.
*You can make an album on Facebook called “items for sale” and you can add to this every once in while. When you do, put a post on your page that says “I just added more to my ‘for sale’ album. Come check it out”. Just make sure to delete pictures of items that you’ve already sold.

I might try this out next time I have some things I want to get rid of!

Adding Essential Oils To Your Homemade Cleaning Products

Adding Essential Oils To Your Homemade Cleaning Products

In an earlier post, I showed you how I made a wonderful all-purpose cleaning spray. I have since made several batches of it and absolutely love it! One thing I’ve done to cut back on the vinegar smell (which really isn’t all that bad to begin with) is to use essential oils. I love essential oils. You can buy them from a place called Mountain Rose Herbs. They have many kinds of essential oils and most of them are organic and are very reasonably priced.

Mountain Rose Herbs

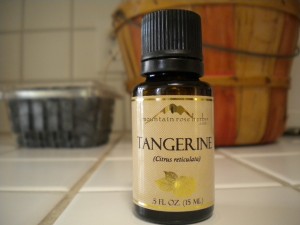
My favorite essential oil to add to my all-purpose spray is Tangerine oil. A .5 ounce bottle costs less than $3. I add about 20 drops to each batch of spray (you can add more if you like) and my bottle still looks full. It’s going to last me a long time! If you look on their website, you’ll find many essential oils to chose from.

If you’re going to buy essential oils from a health food store, make sure they are therapeutic grade and come in a blue or amber bottle (this helps to preserve their potency). Keep in mind that these oils are pretty potent – a little goes a long way! While most essential oils are great for your skin, a few may actually irritate it. It should say right on the bottle if this is a possibility. The tangerine oil I use in my all-purpose cleaner has a little warning on the back that says “potential skin irritant”. Since I use it in a cleaner I’m not concerned about it, however, I wouldn’t put it in my bath. I have gotten a few drops on my hands and it didn’t do anything.

There are many ways you can use essential oils to make your home (and homemade cleaners) smell great! Here are a few ideas:

*Put a few drops (I use 15) on a Kleenex and put it in your bag-less vacuum cleaner. When you run the vacuum it makes your room smell great!

*Put a few drops in a bottle with water and spray around your room as a room deodorizer (or spray your furniture).

*When you make a paste using baking soda and water for cleaning sinks or grout on your counter tops, add a few drops of essential oils.

The great thing about using essential oils to freshen up your home, is that the scent from these oils comes directly from a plant, fruit, or flower. You’re not spraying your home with chemicals which can cause many different kinds of illnesses. Plus it’s cheaper!

Fun With Cafe Rods

Fun With Cafe Rods

I love cafe rods almost as much as I love tension rods. There are so many things you can do with them! Today I was wrapping some gifts for my daughter’s birthday and thought about how nice it would be to have a place to put my wrapping paper. I always keep it standing up in a corner of my closet and it gets unrolled and crinkled too easily. Then it hit me – cafe rods!

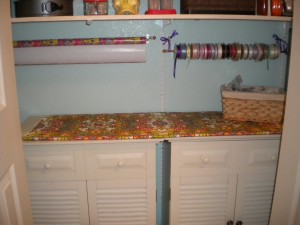
I installed one under a shelf in a closet (husband not required for assembly) in about five minutes. Before, it was just wasted space. Now it’s a great place to store my wrapping paper. I added another one right next to it for ribbon. My ribbon stuck out a little too far and the bar wouldn’t sit in the little hooks. That’s ok! I just hung the bar from some ribbon! Maybe the next time I’m at Home Depot I’ll pick up some bigger brackets for it…or maybe not. I kind of like the way it looks. The best part is, they were only $2.50 a piece.

Cafe rod for wrapping paper and ribbon

Little Black Dress Jewelry Organizer

Little Black Dress Jewelry Organizer

I think these are so cute! This is a great way to organize your jewelry. Put one pair of earrings in each clear pocket and you’ll always be able to find exactly what you’re looking for! There are even larger pockets to put your bracelets. If you flip the dress over, you’ll find hook-and-loop tabs to hang bracelets or necklaces.

Make Your Own Jewelry Organizer

Make Your Own Jewelry Organizer

I love to wear jewelry. I have the cutest little jewelry organizer that I keep in my closet, but I really needed something by my bathroom sink where I take my jewelry off each night. I’m always afraid that something will fall down the drain or my earrings will rust if they get wet – I never said I wore expensive jewelry 🙂

I thought about buying a little shelf to keep by the sink, but then I saw one at a store and thought, “Hey! I can make that!” So, I did. The one in the store costs $25, mine was less than $10. And it’s so much cuter than anything store bought.

Here’s how I made my own jewelry organizer:
Materials:
*Drawer divider (mine came from Walmart and was made out of bamboo)
*12×12 piece of scrapbook paper
*Acrylic craft paint (only if you choose to paint it, you might just want to keep it the wood color)
*Mod Podge (You don’t have to use this. You can use any glue. I used Mod Podge because it works great as a glue and a sealer)
*Screw eyes (These are little screws with a loop at the end.)
*Picture hanger
*Nail, hammer, and a vice-grip
*Optional – trim, felt
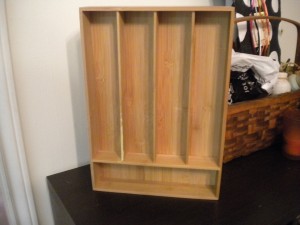
Before

I painted my drawer organizer a soft yellow color. I had to give it two coats. It only took about an hour to dry so I was able to move on to the next step fairly quickly – the scrapbook paper. I simply measured each opening and cut the paper to that size. I then put a thin layer of Mod Podge in each compartment (working on just one at a time) and then put in the paper. You don’t want to use too much Mod Podge, or any glue, because it can make the paper bubble. Mine still bubbled a little bit but it’s not noticeable unless you know it’s there. I put in half the sheet of paper, smoothed it down, and then laid the rest in. That seemed to make it easier. After I put in each piece I put a thin layer of Mod Podge over all the paper to seal it and help insure it doesn’t get torn sometime in the future. I let mine dry over night.

Then it was time to use the little screw eyes. I bought mine at a home improvement store in the hardware section. I had never used these little guys before and had no idea how to put them in. I ended up using a nail, which I held with a vice grip, and hammered in just a little bit to make a small hole. Then I used the vice grips to hold on to the screw eyes and I just screwed it in. Very easy process. Just be careful, the end of each screw came through the underside of the wood a little bit. Make sure it doesn’t scratch whatever surface you’re working on, or even yourself when you pick it up.

The last step is to nail the picture hanger to the back of the jewelry organizer. Viola! You now have the cutest jewelry organizer to hang on your wall! Here is a picture of my finished product.
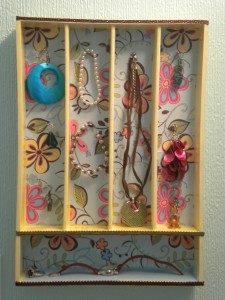
After

Oh, one more thing. I had some extra ribbon with adhesive on the back, and I used it to trim mine out a little bit. I also added a little strip of felt to the bottom shelf so my watch wouldn’t slip off easily or get scratched. Super easy, super cute, super cheap!

*Another great tip – you don’t have to leave this upright! You can turn it side ways or even upside down! You can also use the top of it as a shelf to keep perfumes or face creams or whatever else you can think of!

What ideas do you have for this jewelry organizer? What other things could you use it for?

How to Make Your Own All Purpose Cleaner

How to Make Your Own All Purpose Cleaner

I came across a recipe on Facebook for an all-purpose cleaner you could make yourself. I’m really trying to cut down on the amount of chemicals I use around here, so I thought I would give it a try. Here is the recipe:

*A large jar with a lid (I used a mason jar)
*At least 6 lemons depending on the size of lemons and the size of the jar (you can also use oranges, grapefruit or limes)
*White vinegar

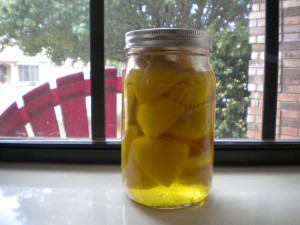
First cut the lemons in half and juice them to make lemonade (recipe for lemonade at the end of the post). Put the rinds in the large jar, fill to the top with vinegar, and put on the lid. Now you just let it sit for two weeks. That’s the hard part. I’m not a very patient person. After two weeks you remove the rinds, strain the liquid, and put the vinegar/citrus liquid in a spray bottle with water. You use one part water to one part of the vinegar/citrus mix. Mine made 1 2/3 cup of the mix so I added that much water.

Lemon rinds in vinegar

I made this two weeks ago, and this morning I got to open the jar and see if this stuff really works. My biggest concern was the smell. I’m not a huge fan of vinegar and I didn’t know if the lemon would over power it enough. To my delight, I opened the jar and didn’t gag! Yay! Good so far! Now the real test – how well does it clean?

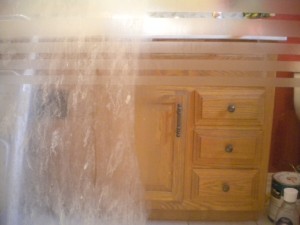
I’ve been in my current house for three months now, and since that time I’ve tried and tried to get the shower door in my kids’ bathroom clean. Nothing I use does the trick. I decided to really put this stuff to the test. Again, to my delight (and utter astonishment), it cleaned the soap scum, water spots and mineral deposits off the door when all the many strong chemical cleaners couldn’t do it. Check out my door now!

Shower door with a section cleaned with the vinegar/citrus cleaner

Now for my favorite lemonade recipe:
6 lemons (or one cup of lemon juice – sometimes it takes 7 lemons depending on the size)
1 cup sugar (or one cup honey if you’d like to try something different)
4 cups water
1/2 cup blackberries (optional)

In a small sauce pan add 2 cups of water with one cup sugar. Cook and stir until sugar is dissolved (or use honey instead of sugar if you like). Once dissolved, set aside to cool.

Juice lemons until you get one cup of lemon juice.

Poor lemon juice and sugar water into a pitcher and add 2 cups of water (or more if you like it a little weaker).

If you want to add the blackberries, first put them in the blender, then put through a strainer. Add the liquid and stir. Yum!

*On a side note if you have a left over lemon rind put it in your garbage disposal and turn it on. It cleans and deodorizes while it’s in there!

How to Clean the Grout on a Tile Counter Top

How to Clean the Grout on a Tile Counter Top

I really don’t like counter tops with tile. Unfortunately, my last few houses have had tile counter tops in both the kitchen and the bathroom. The grout seems to stain and get dirty so easily.

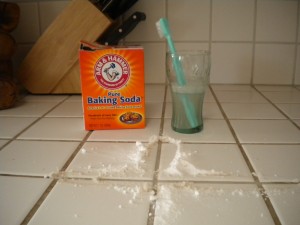
I have always cleaned the grout between the tiles using those little bleach pens and an old toothbrush. Today when I started to clean the grout in the new house, I hated the thought of breathing in those awful bleach fumes. I’m really trying to remove a lot of chemicals in my house and clean things with vinegar,baking soda, and other natural things. That got me thinking – if I cleaned the grout with baking soda, would it work as well as bleach? There was only one way to find out. I cleaned a section of my counter top the way I always did with a bleach pen and a tooth brush. Then I did a section right next to it by pouring a little bit of baking soda on the counter and using a wet toothbrush (not the same one I used with the bleach) to scrub the grout lines.

Cleaning Grout with Baking Soda

First off, the bleached section smelled so bad it made me feel sick. But after scrubbing with a toothbrush for a few seconds or so, the grout looked almost as good as new. I did notice a few cracks in the grout which made me a little nervous. I didn’t remember seeing those before. The baking powder section took a little more elbow grease but not much. Not only was there no smell, but when I compared the sections right next to each other, I thought the baking soda side actually looked better.
Not only did I like the baking soda better, it’s also cheaper. Just in the small section I did with the bleach pen (probably a 2×2 foot area) I used half of the bleach pen. I only used a very small portion of my small box of baking soda.

Now before you try this at home, let me tell you that I have a white tiled counter top with white grout. If you have colored grout you probably don’t want to try the bleach at all. The best way to keep your grout clean is to try to keep it from getting grimy in the first place. A quick scrub with a tooth brush weekly, and wiping up spills as soon as they happen, will help keep your grout stain free.

Tension Rod Divider

Tension Rod Divider

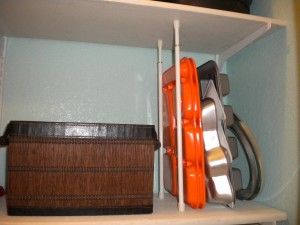
I love tension rods. They are super cheap and there are so many things you can do with them. One of my favorite uses for a tension rod is to use them in a pantry or closet to store muffin pans and cookie sheets in an upright position. This can save you a lot of room versus lying them flat on the shelf.

Tension rod divider

To use tensions rods in this way, first measure the amount of vertical space you have between shelves. Tension rods come in different sizes and you want to make sure you don’t buy one that is too long. You can buy tension rods at just about any discount store and they are usually just a few dollars a piece. If you’re going to prop up one side of the pans against a wall you will only need two rods. If you’re going to put them in the middle of a shelf you’ll need to buy four (two for each side).

Simply attach the tension rod up and down at the front of the shelf and put the second one directly behind it towards the back of the shelf. If you’re putting this in the middle of your shelf do the same thing a few inches away. Now you can save space and store your thin pans upright!

Organizing a Hall Closet

Organizing a Hall Closet

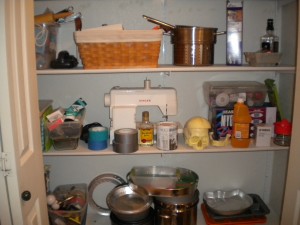
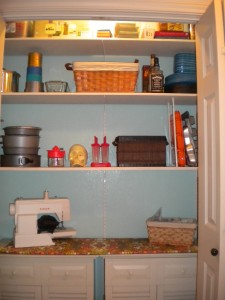
I have this large closet in my hall way that I use to store all kinds of things – extra pots and pans, cleaning products, craft items, home school stuff (see the skull, it’s not real I promise)….pretty much anything I can’t find a home for. Yesterday when I opened it up to take something out I thought about how boring and bland it was. It’s so depressing to look in there! Plus things were starting to get out of hand in there – time to make a change!

Before

By nature I’m not an organized person, I have to really work at it. I’m a willy nilly, fly-by-the-seat-of-your-pants kind of gal. I don’t like structure or schedules and I would rather be making messes than cleaning them up. I have learned over the last few years that the best way for me to stay organized is to also make things beautiful. If my closet is pretty, I will keep it clean and organized. This closet needed to be a little prettier…and cleaner.

All it really needed to spruce it up was a little paint. I had some left over paint from a bathroom I painted a few weeks ago. The great thing about painting a closet is it forces you to take everything out first. Once everything was out and the closet was painted I was able to look at the space I had and all the things that were originally in there. I discovered that a lot of it I really didn’t need any more. I filled three garbage bags full of stuff to take to Good Will.

Before I started painting the closet, I had five shelves in there. After getting rid of things I didn’t need any more I decided to only put three back up. This gave me space at the bottom to bring in two cabinets I had sitting in my garage. These cabinets not only made the closet look a little nicer but it gave me some drawer space to put my large kitchen utensils that I don’t use very often.

After

I like the way my closet looks now and it’s much more organized. I can very easily see exactly what’s in there.

Below are a few great tips to organize your closets:
*Use baskets to hold both large and small items
*Use two tension curtain rods and attach to shelf vertically, one in front of the other, up against the wall. Use this space to store muffin pans and other slender items upright (see picture).
*Paint the walls a fun color, just make sure the paint is completely dry before putting shelves and other items back in.
*Put seldom used items at the top of your closet and items you use more often towards the middle or bottom so they are easier to get to.
*Don’t put boxes or other paper items too close to the light on the top shelf. This could cause a fire.

Happy organizing!