Tag Archives: design

Stripes in the Living Room

Stripes in the Living Room


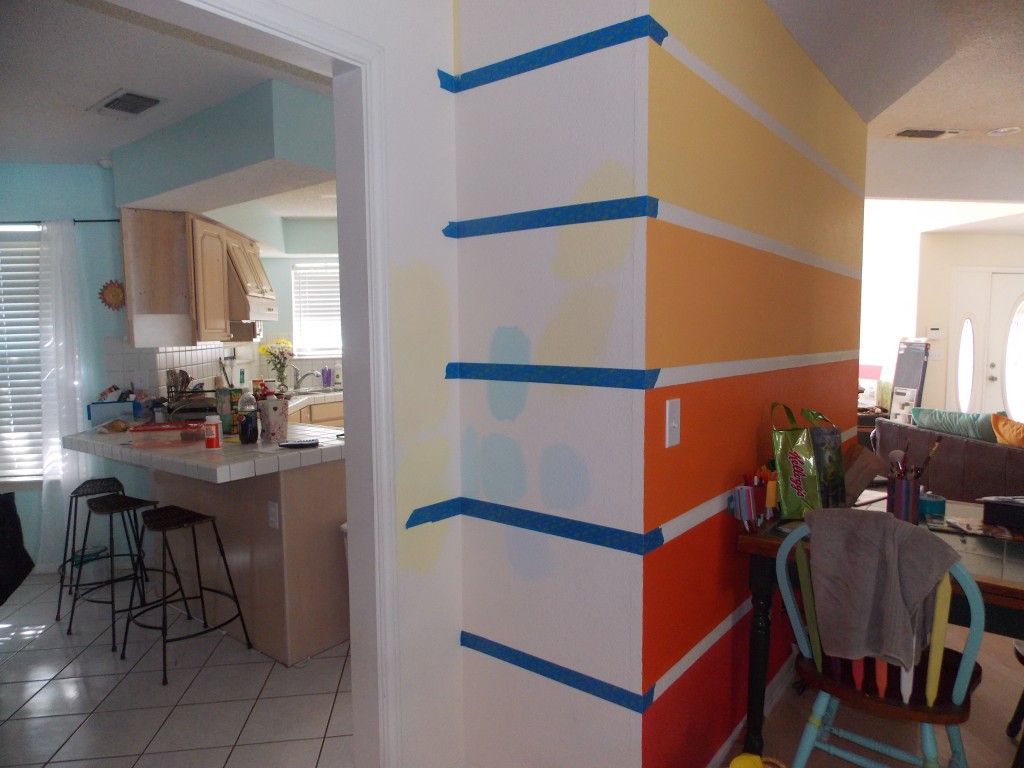
I love stripes. I made wavy ones in my daughter’s room to match a room we saw at the Paradise Pier in Disneyland. I made stripes along the soffit in my kitchen to pull all the colors in my kitchen together. But my favorite stripes so far are the ones in my living room.

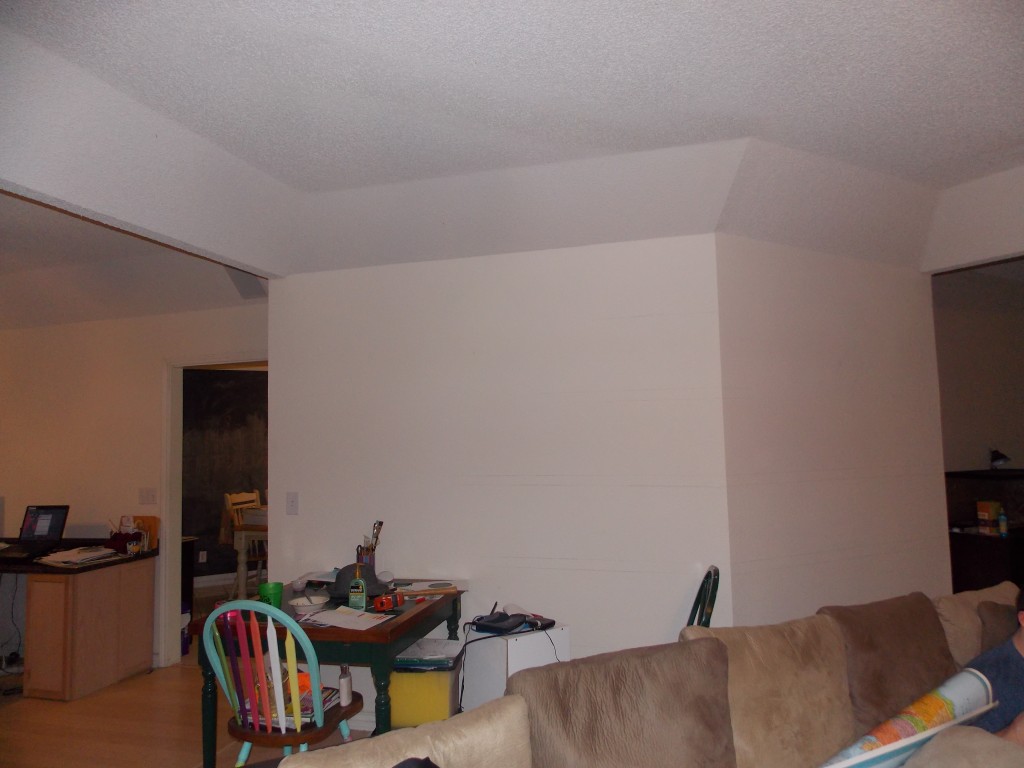
I have a large living room that is all white. It was one of the few rooms I hadn’t painted yet. I wanted to paint it, I just didn’t know what color I wanted it to be. I kept buying those little sample containers of paint at Home Depot and Lowes so I could try out several colors. One day I walked by the wall with all my paint samples on it and decided I liked all the colors!

Living room before stripes

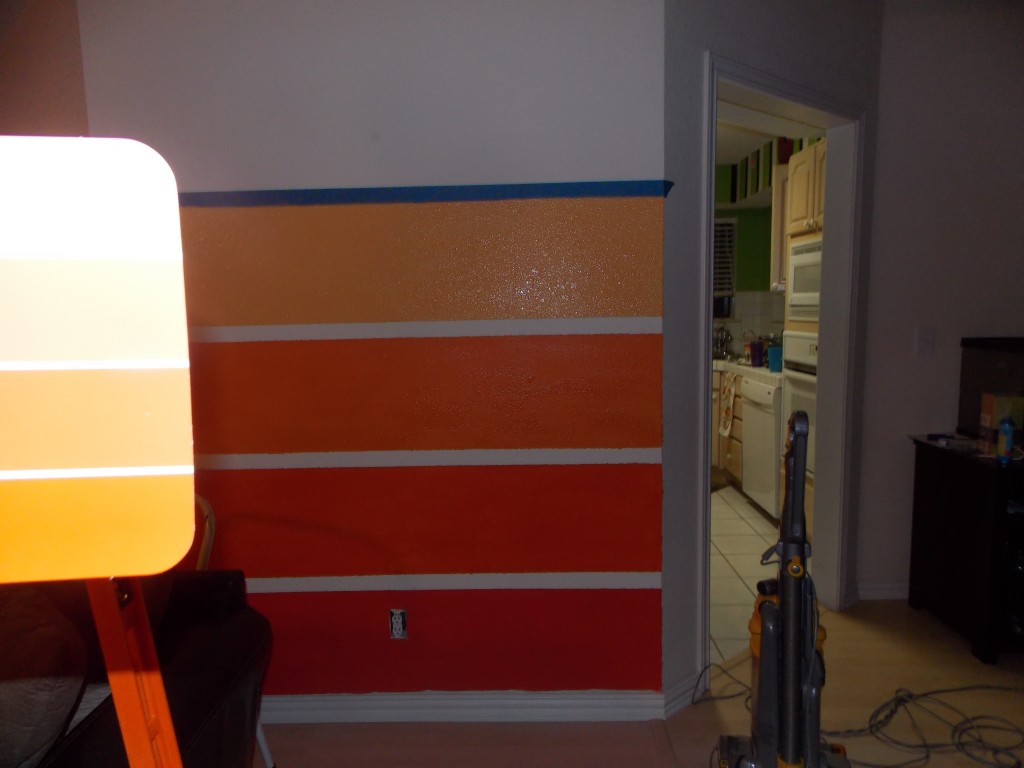
I decided to make stripes on just one wall. I would start with the lightest color and work my way down to darker colors. After four stripes I thought the wall reminded me of something…but what? I stepped back and took a good look at my work. Then it hit me – I had just painted one of those paint sample cards!

Looks like a paint sample card!


I almost stopped right there but I decided to continue on and finish the project. After it was finished I would repaint it if I didn’t like it. But it turns out I love it! It’s bright and fun! It’s just what the room needed!

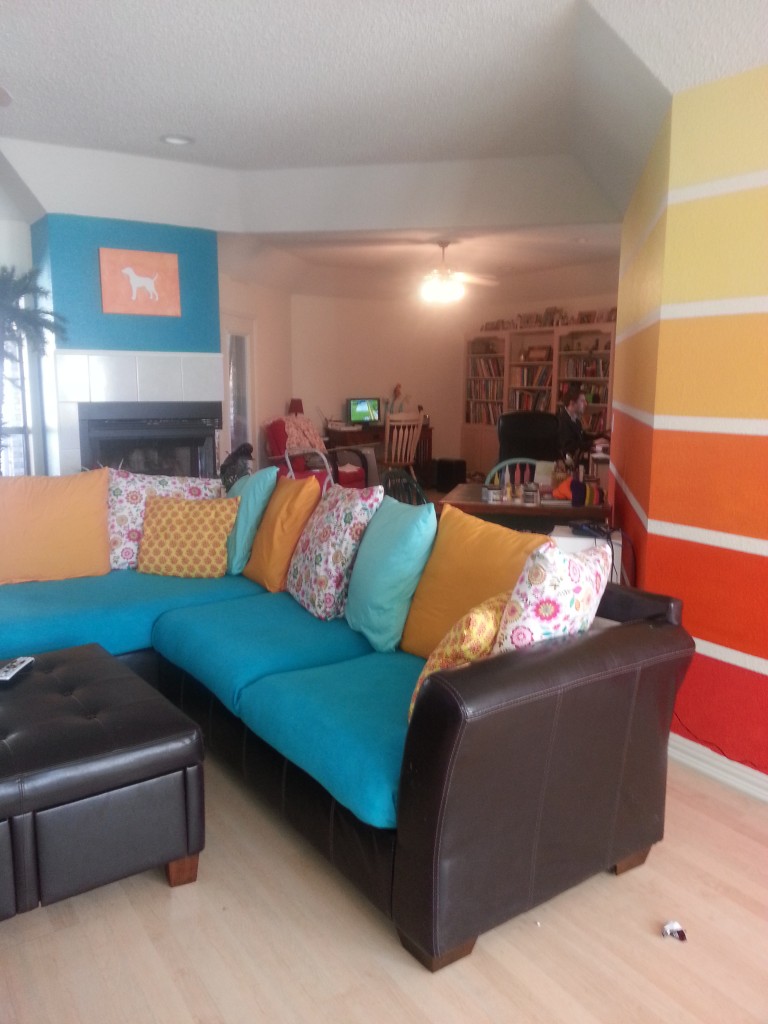
Unfortunately once I re-do something in a room it makes other things look bad. My brown couch looked terrible against the bright orange and yellow wall. I had to change it. Since buying a new couch is out of the question right now I had to work with what I had. I bought fabric at Hobby Lobby and make pillow cases for the pillows all along the back of the couch. I decided on pillow cases instead of completely sewing the pillows in their new cases so I could remove them easily if they needed to be washed. I just tuck the extra fabric behind the pillow. I bought teal blankets at Target and tucked them into the couch.

Making the stripes


Once that was done, the fireplace looked a little sad. I painted that a teal color that is similar to the couch. My 11 year old daughter made the cute painting above the fire place. Click here to see how she did it. My once blah, white living room is now bright and lively. Every time someone walks in the front door they see it and want to come in further to get a better look.

Paints I used from top to bottom:
Peach Tickle – Valspar
Butterscotch Cream – Valspar
Juicy Cantaloupe – Behr
Dragon Fire – Behr
Volcanic Blast – Behr
Fairmont Suite Clay – Valspar
Fire place – La Fonda Turquoise – Velspar

Liven Up The Living Room With Color

Liven Up The Living Room With Color

Living room before stripes


White – Every thing in this house was white when I first moved in. It has taken me a year but I’m down to two white rooms, and with any luck, they won’t be white by the end of the month.

I love color…and I love to paint. One of my sisters jokes with me that it isn’t so much that I love painting as much as it is that I’m addicted to the fumes and couldn’t stop painting if I wanted to. Another sister jokes that every year I actually lose square footage in my home because of all the layers of paint on the walls. She may be right – I’ve painted my kitchen three times since October (3 colors in 10 months).

I decided to add stripes to this room to make one of the walls really stand out. After I finish a project with stripes I always tell myself I’ll never do stripes again. But, I’m a sucker for stripes. I love them. They are really not that hard to do. It just takes time, some good painters tape, and a level.

Making the stripes

Now look how bright and colorful this room is! I love the stripes and the turquoise around he fireplace. I love the pillows (which are actually just simple pillow cases I made for the pillows that came with the couch). Instead of buying a whole new couch I bought micro-fiber blankets to cover the micro-fiber cushions. Both the pillow cases and the blankets can easily be removed at the end of the week for a good washing.

Living room after

I love when people come over to my house and see all the colors – their eyes light up and they want to walk right on in. This room makes me happy and I love that it makes other people happy too.

P.S. See that adorable dog painting above the fireplace? My 11 year old did that! Click here to see how it’s done and make one for yourself!

My Black Bathroom

My Black Bathroom


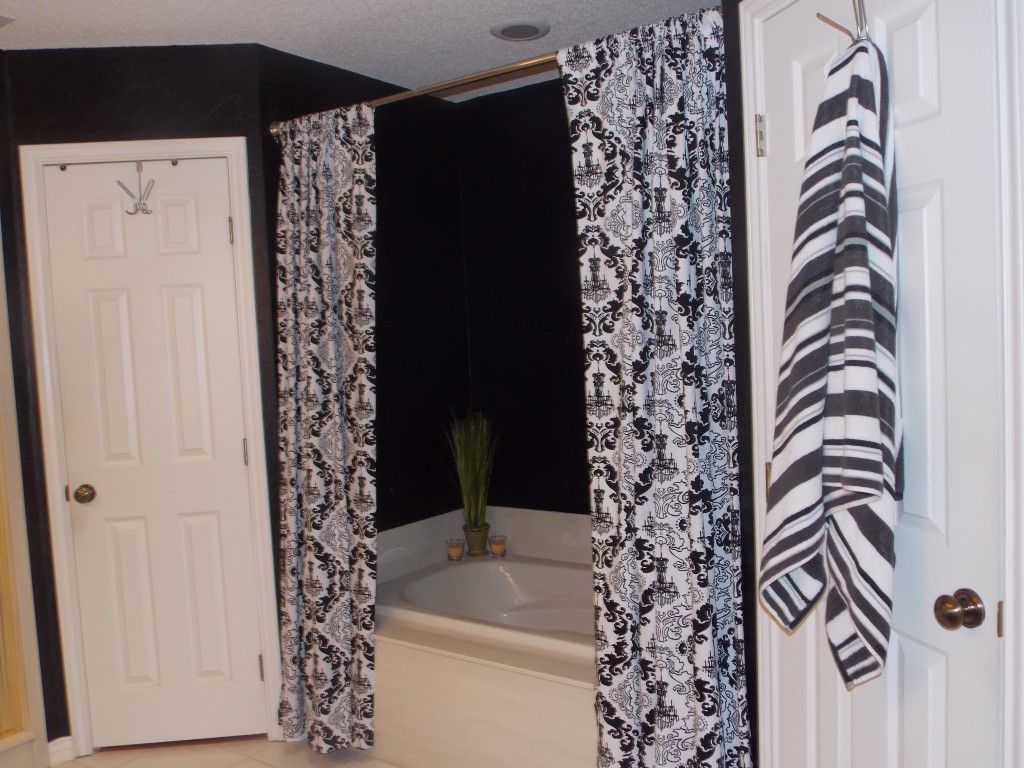
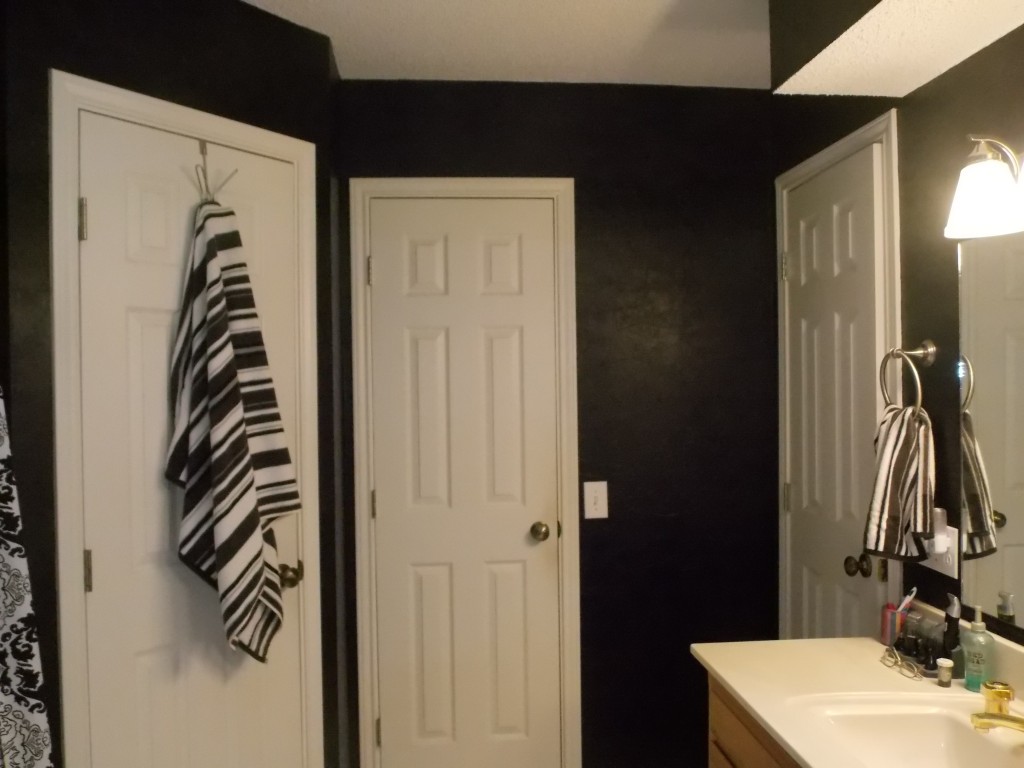
My master bedroom is a light green color. I wanted my master bathroom to be just a few shades darker. After 6 different shades of green samples painted on the walls (all of them hideous) I decided to rethink the green. Maybe I didn’t like the green samples because in my heart I knew I didn’t really want green – I wanted black. Could I convince the husband that a black bathroom would be awesome? I called him in there and broke the news to him gently. Thankfully he just shrugged and said to give it a try. I love that man. He’s used to my crazy ideas but even this felt a little over the top for me. Before either one of us could change our minds I rushed out and got a black paint from Lowes.

Here’s why I thought I could pull off black walls in my bathroom:
* All of my trim in the bathroom is white.
* The bathroom floor is white.
* I have a sky light. You don’t have to have a skylight to use black in a room, just make sure you have plenty of light from some source. If your bathroom lights aren’t bright enough consider replacing them.
* I used a satin paint instead of a really glossy paint. The glossier the paint the more it shows imperfections. Stick with either satin or a matte finish.
* I used a few yellow items in the room to brighten things up a little.

I love to paint and I think out of all the rooms I’ve painted, this one may be my favorite. The room is beautiful and comfortable. Plus our his and hers closets look fabulous with the black. To see our closets check out here (my closet) and here (my husband’s closet).

Adding Storage to Your Bed

Adding Storage to Your Bed

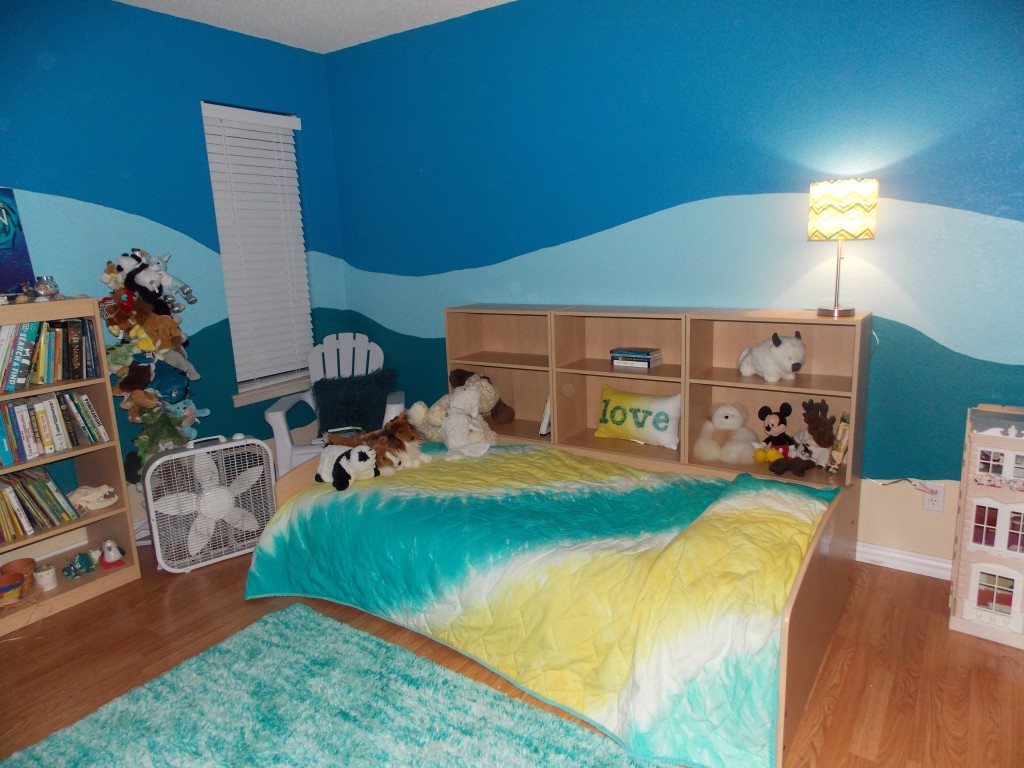
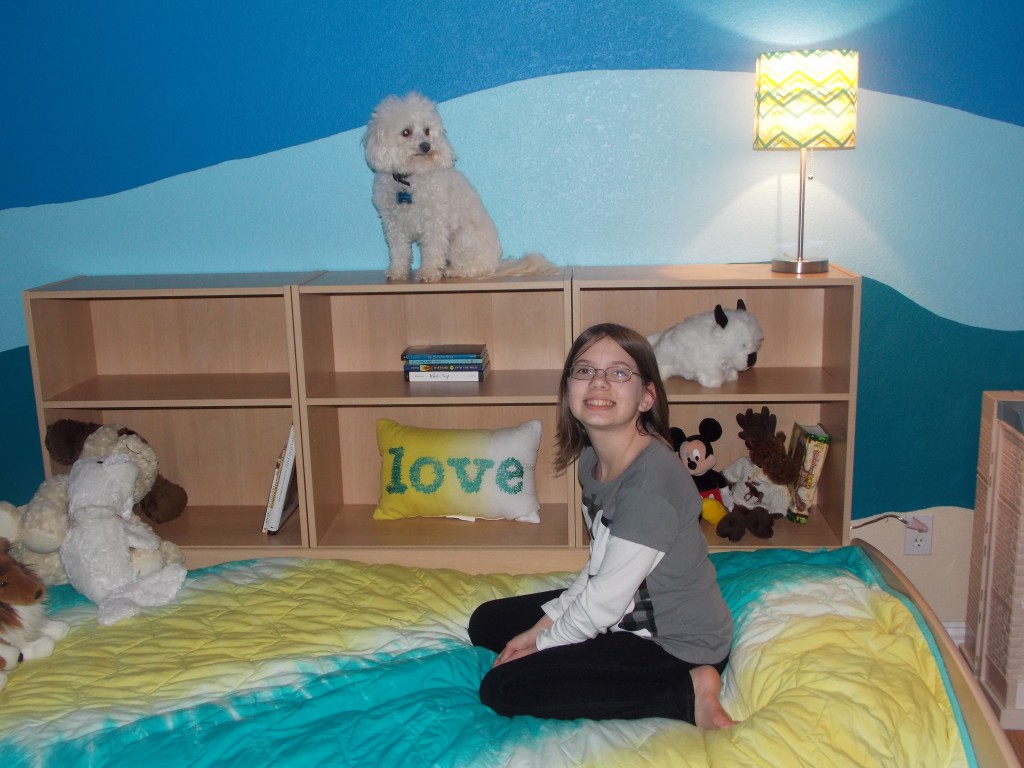
My 11 year old tells me one afternoon that she’s tired of her bunk bed and she wants a new bed – one lower to the ground so she doesn’t have to worry about hitting her head on the ceiling. We make a trip to a local furniture store and of course she picks out the most expensive bed they have – a beautiful single bed with lots of shelves along the back side of it. I really wanted to buy it for her but the $1000 price tag (not counting a mattress) was just a bit too steep for me. I took a picture of it and told her I was sure we could somehow make something similar for a lot less.

I came home, ate some peanut M&M’s (those help me think better), and came up with an idea. I was so excited I got started right away. I took apart her bunk bed and used one of the bunks. I went to Target and bought three short bookcases the same color as her bed. I lined the bookshelves against the wall and put her bed in front of it. Ta-da! Same concept as the $1000 bed but it only cost me $68!

Not only was it much cheaper but it has another benefit as well. The bed blocks the bottom shelf of all the bookcases but we are still able to use them as storage. She puts things on the bottom shelf that she wants to protect or doesn’t want to get rid of yet. If she ever needs them she can just pull her bed out to get to them.

If you make this yourself keep in mind that different stores sell different size book shelves. The book shelves I got at Target are taller and skinnier than the ones our Wal-mart sells. My three bookshelves were about an inch shorter than the bed but it doesn’t matter – you can’t tell.

She’s one happy little girl. She has a beautiful bed that contains lots of storage. Even the dog likes it 🙂

Turning A Wasted Space Into a Work Space

Turning A Wasted Space Into a Work Space

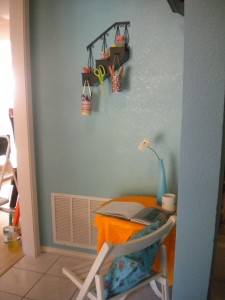
I have a small area between the living room and the master bed room that is just wasted space. It’s only about a 4×4 foot space. It’s a bright area; light comes from the living room, plus there is an outside door in that tiny space as well. Since I moved here, that space has stumped me. I hate wasted space!

One day I was thinking about how nice it would be to have a space I could sit and drink my tea and look out at the birds in the back yard. It would also be nice to have a little area to read, write letters, be inspired (I know, I want a lot of things). Could I make all that in that little 4×4 foot space? Could I make a mini-sunroom, work space, creative nook, and reading area? I could try!

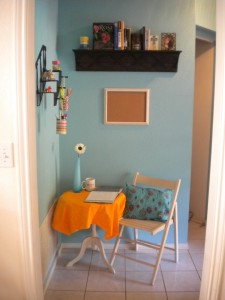
I worked on it all day today, and I have to say that I’m really happy with my new space. Not only did I get all the things I wanted out of this space, I also made homes for things that didn’t have a home before:

*I added space for several books on the new shelf. On a side note, that shelf came from Hobby Lobby and I got it half off so it only cost me $22.
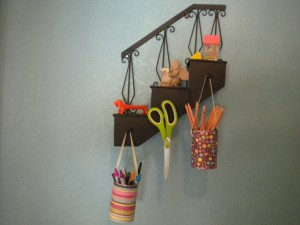
*I added a space for colored pencils, pens and other office supplies. The step shelf also came from Hobby Lobby and was also half off so I paid $10 for it.
*I used a chair that has been in my garage for 2 years.
*I used a table that came from outside. The paint was worn so I made an easy table cloth.
*I used an old picture frame to make a cute cork board.

If you’d like to see how I made the cute little pen/pencil holders go to my “Make It” section! You’ll also see how I made the cork board.

In case you’re wondering “Hey! What’s that white thing hanging on the wall in the “before” picture and where did it go in the “after” picture?” That is my door bell. I hung the shelf directly under it and put a book in front of it to hide it. Pretty clever!

You may also be wondering who that person is in the back ground of the “before” picture. That is my daughter – I have no idea how she sneaks into some of these pictures!

Organizing a Hall Closet

Organizing a Hall Closet

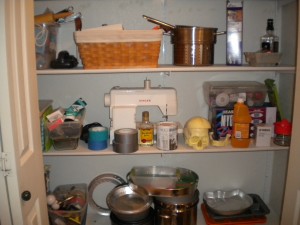
I have this large closet in my hall way that I use to store all kinds of things – extra pots and pans, cleaning products, craft items, home school stuff (see the skull, it’s not real I promise)….pretty much anything I can’t find a home for. Yesterday when I opened it up to take something out I thought about how boring and bland it was. It’s so depressing to look in there! Plus things were starting to get out of hand in there – time to make a change!

Before

By nature I’m not an organized person, I have to really work at it. I’m a willy nilly, fly-by-the-seat-of-your-pants kind of gal. I don’t like structure or schedules and I would rather be making messes than cleaning them up. I have learned over the last few years that the best way for me to stay organized is to also make things beautiful. If my closet is pretty, I will keep it clean and organized. This closet needed to be a little prettier…and cleaner.

All it really needed to spruce it up was a little paint. I had some left over paint from a bathroom I painted a few weeks ago. The great thing about painting a closet is it forces you to take everything out first. Once everything was out and the closet was painted I was able to look at the space I had and all the things that were originally in there. I discovered that a lot of it I really didn’t need any more. I filled three garbage bags full of stuff to take to Good Will.

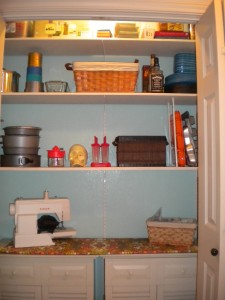
Before I started painting the closet, I had five shelves in there. After getting rid of things I didn’t need any more I decided to only put three back up. This gave me space at the bottom to bring in two cabinets I had sitting in my garage. These cabinets not only made the closet look a little nicer but it gave me some drawer space to put my large kitchen utensils that I don’t use very often.

After

I like the way my closet looks now and it’s much more organized. I can very easily see exactly what’s in there.

Below are a few great tips to organize your closets:
*Use baskets to hold both large and small items
*Use two tension curtain rods and attach to shelf vertically, one in front of the other, up against the wall. Use this space to store muffin pans and other slender items upright (see picture).
*Paint the walls a fun color, just make sure the paint is completely dry before putting shelves and other items back in.
*Put seldom used items at the top of your closet and items you use more often towards the middle or bottom so they are easier to get to.
*Don’t put boxes or other paper items too close to the light on the top shelf. This could cause a fire.

Happy organizing!